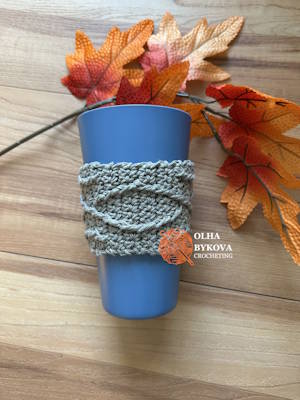
THE Diamond Weave Cup Cozy – crochet PATTERN
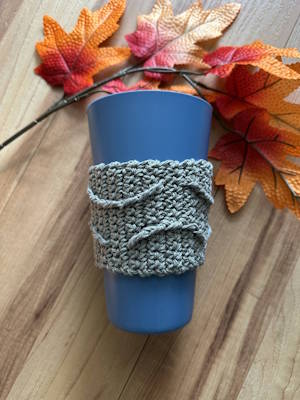
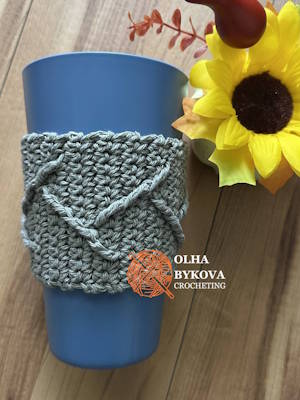
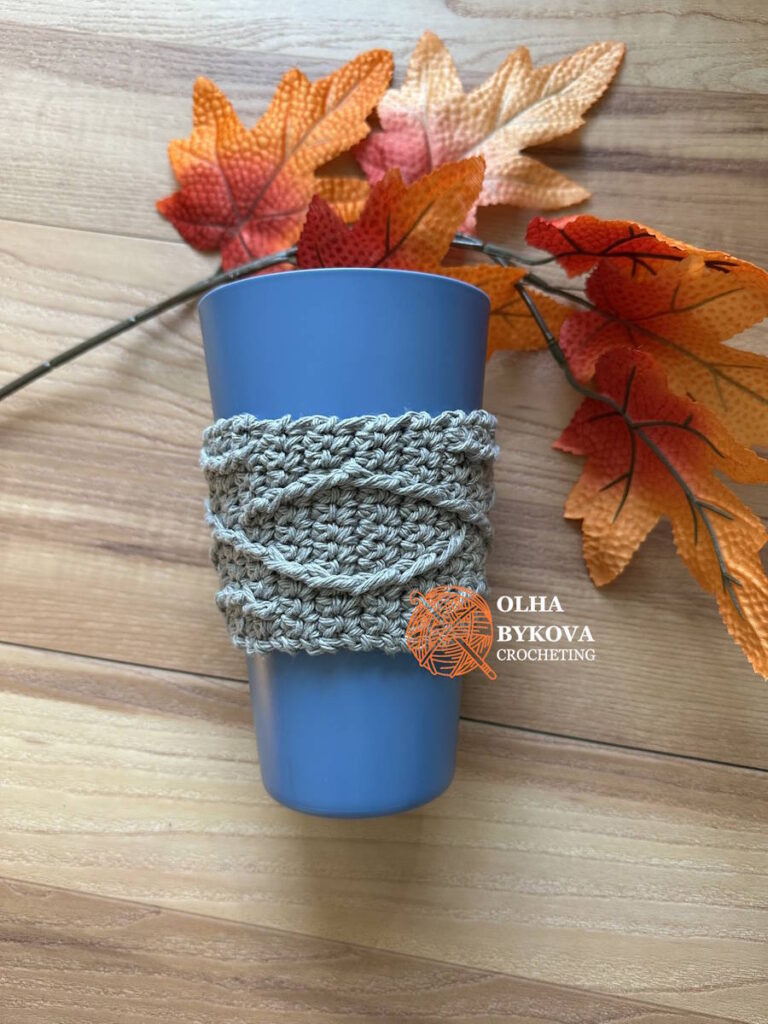
Some crochet textures immediately catch your eye — not because they are overly complex, but because they feel structured, balanced, and beautifully intentional. The Diamond Weave Cup Cozy is exactly that kind of design.
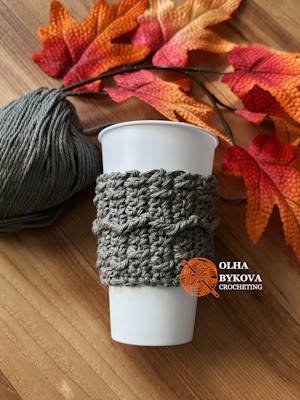
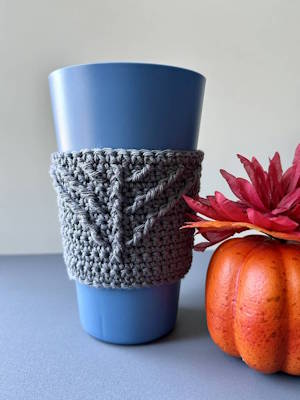
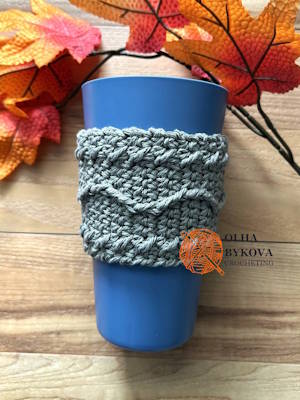
This crochet cup cozy features a woven, almost architectural texture that creates the look of interlocking lines across the fabric. It’s a simple idea, but the result feels rich and detailed, making this crochet coffee sleeve stand out from more basic designs.
And the best part — this is a coffee cup cozy crochet pattern free, so you can try it right away.
A structured and textured crochet cup cozy
The defining feature of this cup cozy is its diamond-inspired texture. The stitches create a subtle woven effect that feels both modern and timeless at the same time.
While the pattern is built with simple techniques, the final look has that signature depth often associated with aran and cable crochet. It’s not a traditional celtic cable pattern, but it carries a similar sense of movement and structure — just in a lighter, more minimal way.
This makes it a perfect example of textured crochet that feels refined without being heavy.
A crochet coffee sleeve pattern that’s engaging to make
This coffee sleeve crochet pattern is designed to keep your hands busy and your mind relaxed.
The stitch placement creates a repeating rhythm, but it’s not completely predictable — which makes the process more interesting. You’ll see the texture develop gradually, row by row, until the woven effect becomes fully visible.
If you enjoy patterns that are:
- structured but not complicated
- textured but still practical
- visually interesting without being overwhelming
this crochet mug cozy pattern is a great fit.
A practical crochet mug cozy for everyday use
This design works beautifully as both a crochet mug cozy and a crochet coffee sleeve.
The fabric has enough structure to hold its shape, while still remaining flexible and comfortable to use. That balance is essential for a good cozy cup crochet pattern, especially for everyday items.
Whether you’re making one for yourself, as a gift, or to sell, this is one of those crochet mug cozies that looks polished and intentional.
A modern interpretation of aran texture
What makes this pattern especially interesting is how it translates classic texture into a smaller, more practical project.
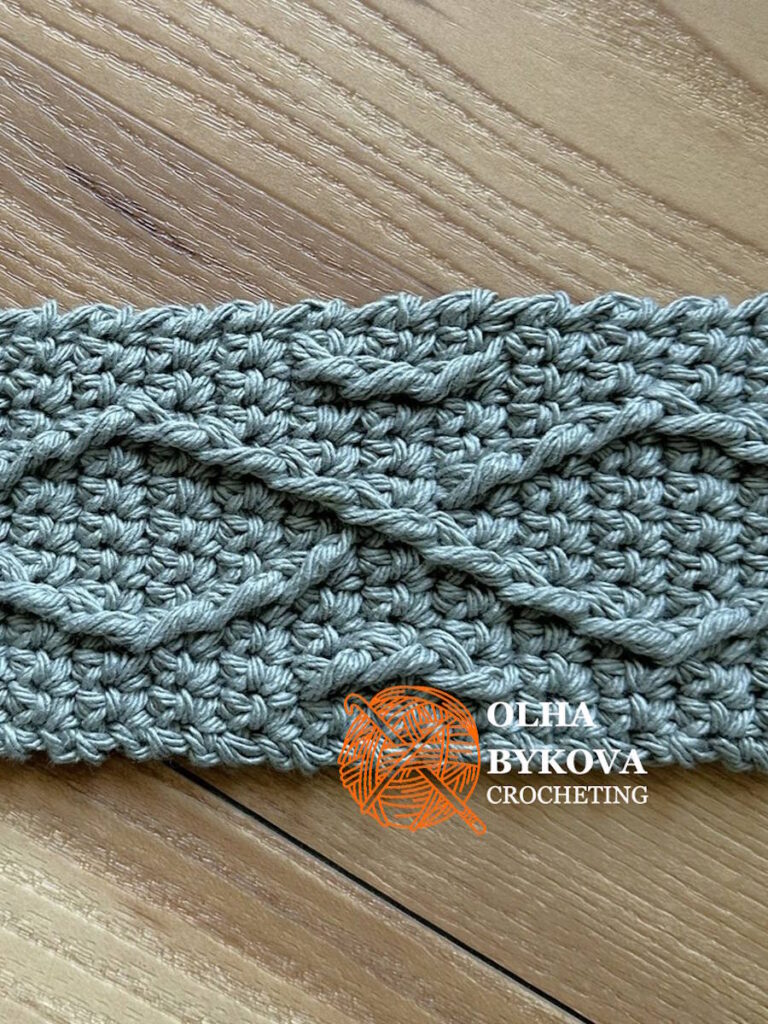
The raised stitches echo the movement of cable and aran designs, but instead of thick braids, you get a cleaner, more geometric result. The diamond layout creates a sense of order and flow that feels both modern and timeless.
It’s a great option if you love textured crochet but want something lighter and more versatile.
Materials
Yarn: worsted weight (#4 medium) 100% cotton yarn,18 g (28 m / 31 yds).
Any yarn of similar weight and fiber content can be used as a substitute.
HOOK: US G-6 (4.0 mm) or size needed to obtain gauge.
NOTIONS: yarn needle, scissors, tape measure.
Gauge
8 sts and 8 rows = 2 in [5 cm] over textured stitch pattern using suggested hook.
Gauge is always measured after blocking.
Size
Finished width: 3 in [7.5 cm].
Finished length: 10.5 in [26.5 cm].
Designed to fit a standard 20 oz [591 ml] ‘Venti’ cup.
Pattern abbreviations
ch – chain
sc – single crochet
st(s) – stitch(es)
yo – yarn over
rep – repeat
prev – previous
cm – centimeter(s)
in – inch(es)
yd – yard(s)
g – gram(s)
RS – right side
WS – wrong side
SPECIAL STITCHES
fpdc – front post double crochet
Notes
The pattern is worked in rows.
Beginning ch does not count as a stitch.
Each front post stitch replaces the next stitch of the row, always skip the stitch behind each fpdc.
Fpdc stitches are always worked around the post of the stitch two rows below, whether that stitch is a regular sc or fpdc.
Diamond weave cup cozy – written Instructions
Row 1: Ch 13, sc in 2nd ch from hook and in each ch across; ch 1, turn. (12 sts)
Row 2 (WS) and every wrong-side row: Ch 1 (does not count as a st here and throughout the pattern), sc in first st and in each st across; turn.
Row 3 (RS): Ch 1, sc in first st, sk 1 st, fpdc around next sc, sc in next 2 sts, sk 1 st, fpdc around next sc, sc in next 2 sts, fpdc around sc below last st worked, sc in next 2 sts, fpdc around sc below last st worked, sc in last st; turn.
Row 4: Ch 1, sc in first st and in each st across; turn.
Row 5: Ch 1, sc in first 3 sts, sk 1 st, fpdc around next fpdc, sc in next 4 sts, fpdc around fpdc below last st worked, sc in last 3 sts; turn.
Row 6: Ch 1, sc in first st and in each st across; turn.
Row 7: Ch 1, sc in first 2 sts, sk 1 st, fpdc around next fpdc, sc in next 6 sts, fpdc around fpdc below last st worked, sc in last 2 sts; turn.
Row 8: Ch 1, sc in first st and in each st across; turn.
Row 9: Ch 1, sc in first 3 sts, fpdc around fpdc below last st worked, sc in next 4 sts, sk 1 st, fpdc around next fpdc, sc in last 3 sts; turn.
Row 10: Ch 1, sc in first st and in each st across; turn.
Row 11: Ch 1, sc in first 4 sts, fpdc around fpdc below last st worked, sc in next 2 sts, sk 1 st, fpdc around next fpdc, sc in last 4 sts; turn.
Row 12: Ch 1, sc in first st and in each st across; turn.
Row 13: Ch 1, sc in first 2 sts, fpdc around sc below last st worked, sc in next 2 sts, fpdc around fpdc below last st worked, sk 1 st, fpdc around next fpdc, sc in next 2 sts, sk 1 st, fpdc around next sc, sc in last 2 sts; turn.
Row 14: Ch 1, sc in first st and in each st across; turn.
Row 15: Ch 1, sc in first 2 sts, fpdc around next fpdc, sc in next 2 sts, sk 1 st, fpdc around next fpdc, sc in next 3 sts, fpdc around next fpdc, sc in last 2 sts; turn.
Row 16: Ch 1, sc in first st and in each st across; turn.
Row 17: Ch 1, sc in first st, sk 1 st, fpdc around next fpdc, sc in next 2 sts, sk 1 st, fpdc around next fpdc, sc in next 2 sts, fpdc around sc below last st worked, sc in next 2 sts, fpdc around fpdc below last st worked, sc in last st; turn.
Rep Rows 4–17 until the length of the cozy before seaming reaches 10 in [25 cm]. The number of rows may vary depending on your tension, adjust as needed.
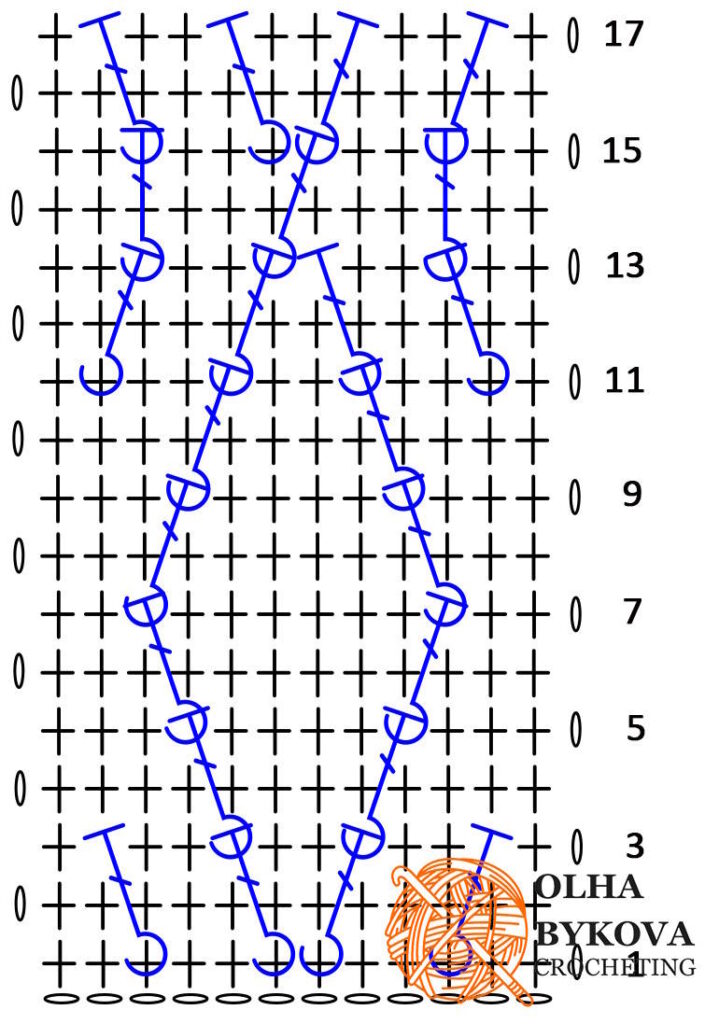
The diagram shows the stitch repeat for Rows 4–17. Read RS rows from right to left and WS rows from left to right. Refer to Key for stitch symbols.
Fasten off, leaving a 10 in tail for seaming.
FINISHING: Using yarn needle, seam short ends together using mattress stitch. Fasten off and weave in ends.

Care for the finished piece according to the yarn label instructions.
Pattern Reminders
- This free pattern is intended for personal use only. Reproduction, distribution, or commercial use without the designer’s permission is not allowed.
- You may sell finished items made using this pattern, but please credit the designer: Olha Bykova Crocheting.
- Share your finished projects! I love seeing how you bring this pattern to life. Tag your photos with #OlhaBykovaCrocheting on social media.
- For any questions about the pattern or techniques used, please refer to the stitch glossary or contact the designer.
Support my work and enjoy an easy, well-structured crochet experience you’ll love!
Wishing you many happy stitches and lots of joyful crocheting!
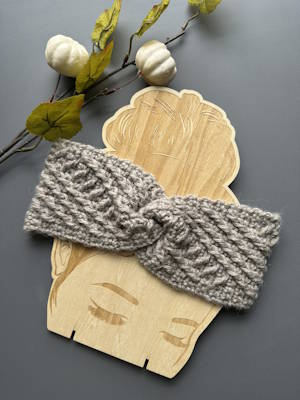
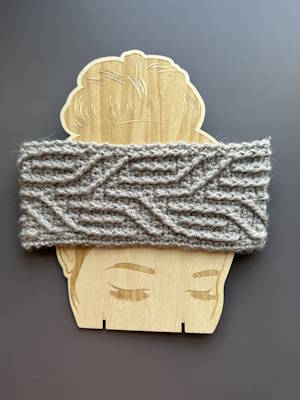
Loved this pattern? Take a look at my other textured and aran crochet patterns — each one made to bring a touch of cozy handmade charm to your next project.