Front Post Double Crochet (fpdc): Complete Guide + Variations, Charts & Tips
- What is Front Post Double Crochet (fpdc)?
- Where is fpdc used?
- Fpdc vs dc: What’s the difference?
- Fpdc placement: previous row and 2 rows below
- How to crochet fpdc (step-by-step tutorial)
- Why you need to skip stitches behind fpdc
- How to crochet right leaning (skipping 1 stitch and working around next stitch) front post double crochet
- How to crochet left leaning (worked 2 rows below last stitch worked) front post double crochet
- Fpdc in crochet charts (symbols explained)
- Tips and troubleshooting
What is Front Post Double Crochet (fpdc)?
Front post double crochet (fpdc) is a crochet stitch worked around the post of a stitch instead of into the top two loops. This creates a raised, textured effect that stands out on the surface of the fabric and adds depth, structure, and dimension. The stitch wraps around the vertical post of the stitch, pushing it forward and making it more visible.
It is also one of the most commonly used stitches in my own designs, because it allows for endless variations — from simple raised lines to complex, structured textures.
Where is fpdc used?
Fpdc is widely used in crochet to create texture, structure, and visual interest in the fabric. Because the stitch is worked around the post, it naturally stands out from the surface, making it perfect for designs where texture is the main focus.
You will often see fpdc used in crochet cables and braided patterns, ribbing for hats, cuffs, and edges, textured stitch patterns and panels, blankets, hats, cowls, and pillows, any project where you want to add depth and dimension.
Fpdc is especially useful when you want your stitches to be clearly defined and visible, rather than blending into a flat fabric like dc.
Fpdc vs dc: What’s the difference?
Understanding the difference between fpdc and dc is essential, because where you insert your hook directly affects the final look of your fabric.
Dc (double crochet) is usually worked into the top two loops of the stitch, which creates a flat, smooth fabric. The stitches sit next to each other without standing out, making dc ideal for simple, even surfaces.
Fpdc (front post double crochet), on the other hand, is worked around the post of a stitch from front to back to front. Instead of sitting flat, the stitch is pushed forward, creating a raised, textured effect.
This difference in placement is what gives fpdc its unique look. While dc blends into the fabric, fpdc stands out and adds depth, structure, and dimension. This is why fpdc is commonly used in textured patterns, ribbing, and crochet cables.
Once you understand this distinction, it becomes much easier to control how your fabric looks and feels — whether you want it to stay smooth or become richly textured.
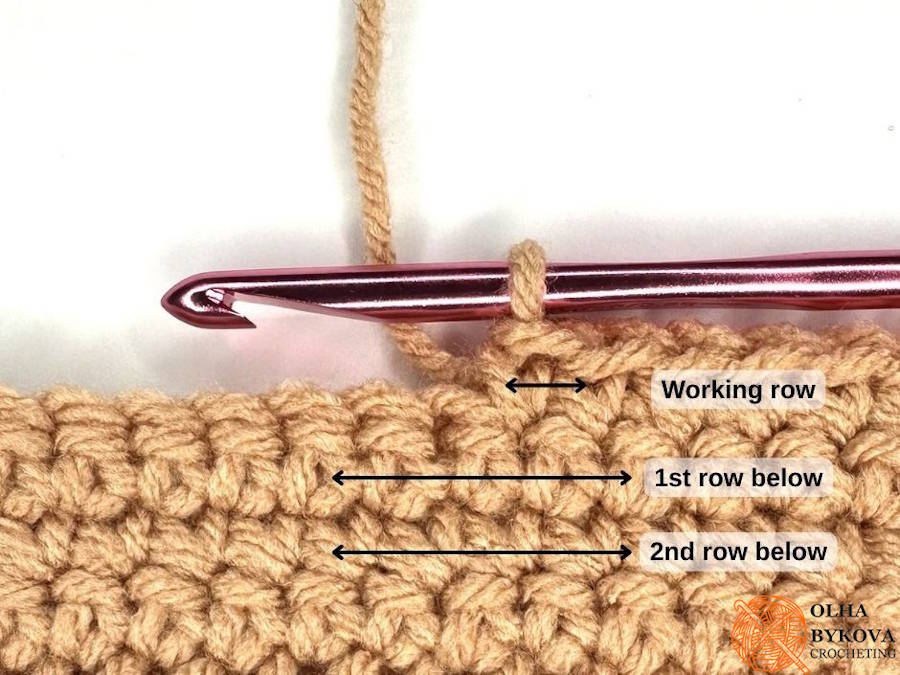
Fpdc placement: previous row and 2 rows below
Fpdc is most commonly worked around the post of a stitch from the previous row. This is the standard placement and the one you will see in most beginner tutorials.
When working this way, you simply insert your hook around the post of the stitch directly below, and complete the stitch as usual. This creates a clean, raised texture that follows the structure of the fabric.
However, fpdc can also be worked around the post of a stitch 2 rows below. In this case, you skip the stitch in the current row and insert your hook around a deeper post. This creates a more pronounced, layered texture and adds extra depth to the fabric.
Working fpdc 2 rows below may feel less intuitive at first, because you need to identify the correct stitch, maintain your stitch count, keep your tension even.
But once you get used to it, this technique opens up many more design possibilities, especially for textured patterns and cables.
In my own designs, I most often use fpdc worked 2 rows below, because it creates a richer and more defined texture. That’s why in the tutorial below, I will show you how to work fpdc using this method.
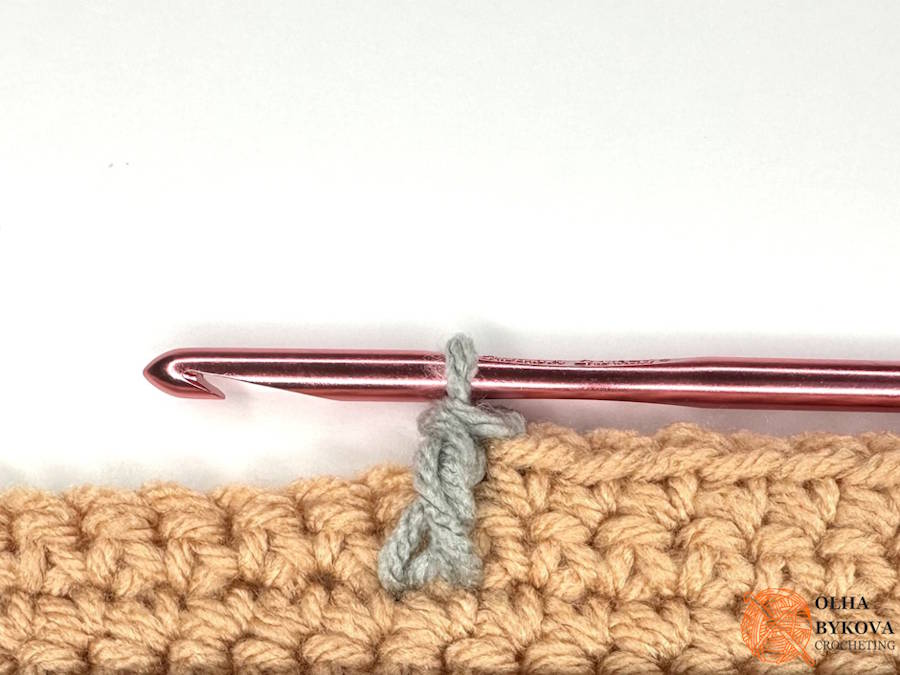
How to crochet fpdc (step-by-step tutorial)
Follow these steps to crochet fpdc:
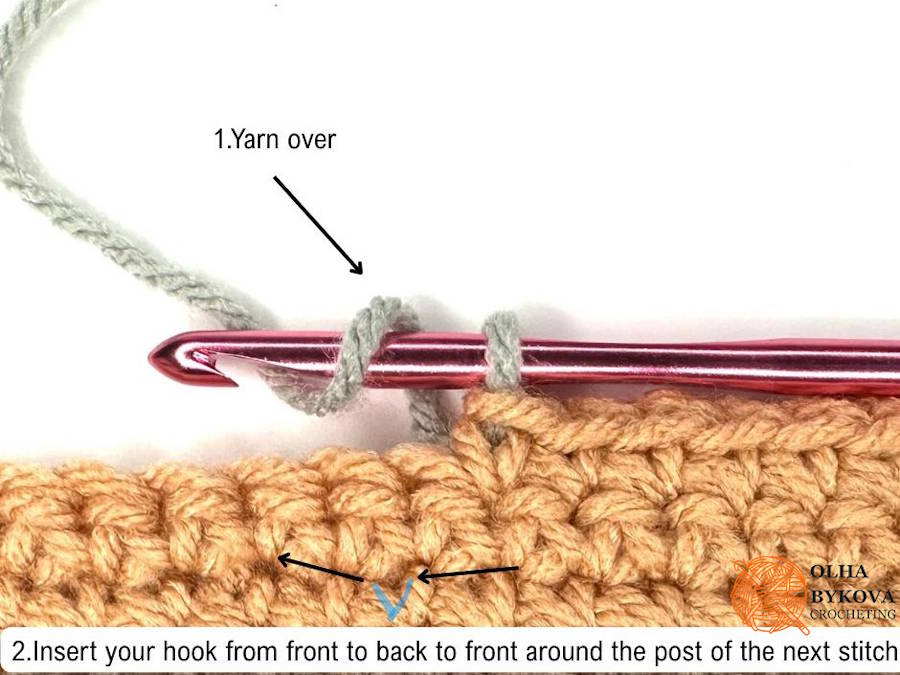
1. Yarn over
2. Insert your hook from front to back to front around the post of the next stitch – this can be any type of stitch (sc, hdc, dc, fpdc, fptr)
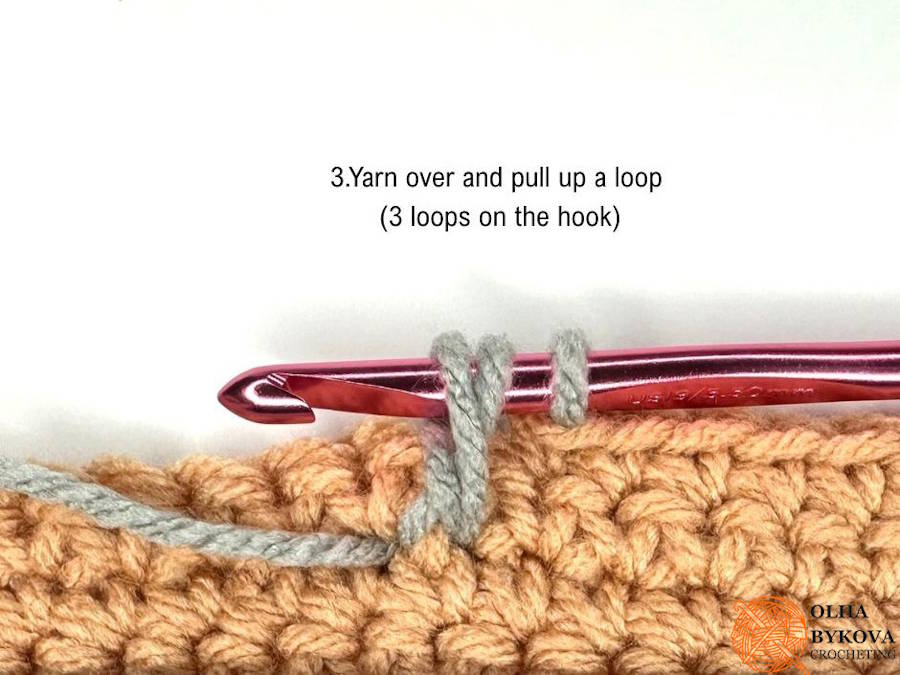
3. Yarn over and pull up a loop (you should have 3 loops on your hook)
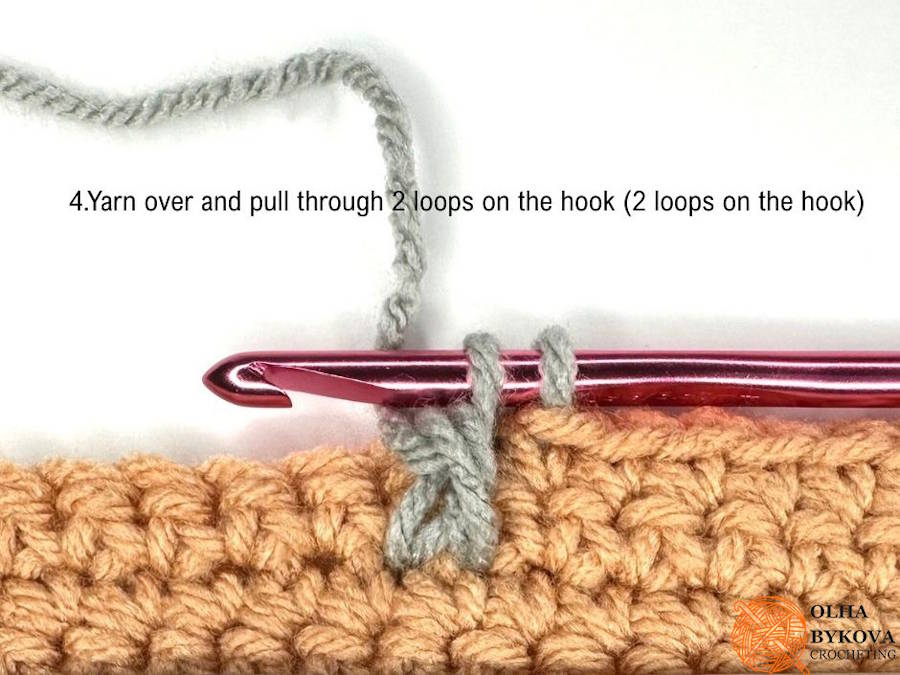
4. Yarn over, pull through 2 loops
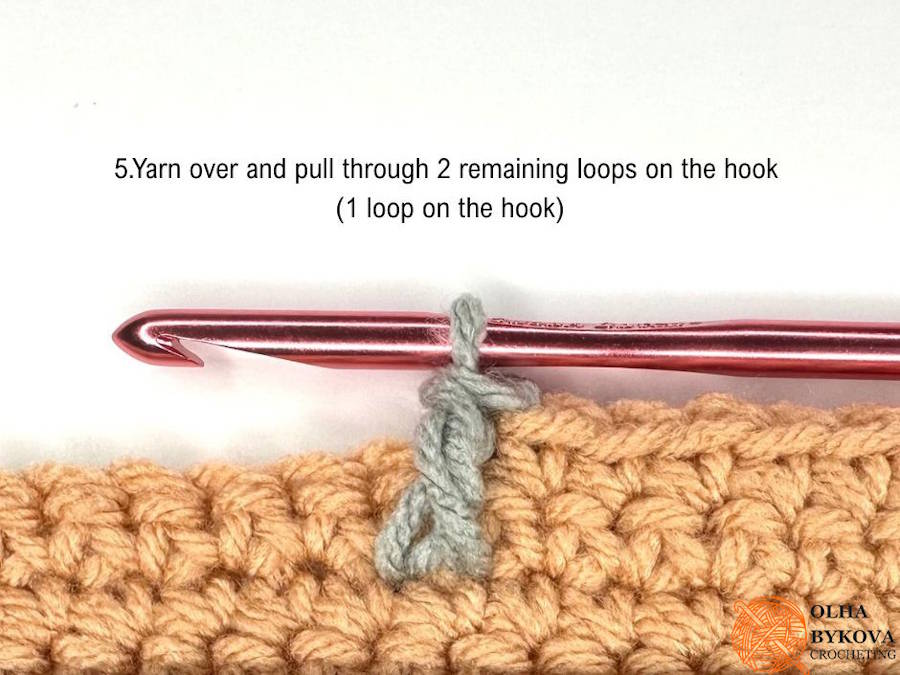
5. Yarn over, pull through remaining 2 loops
You have completed one fpdc.
Take a moment to notice how the stitch sits on the surface of the fabric — this will help you understand how fpdc builds texture in more complex patterns.
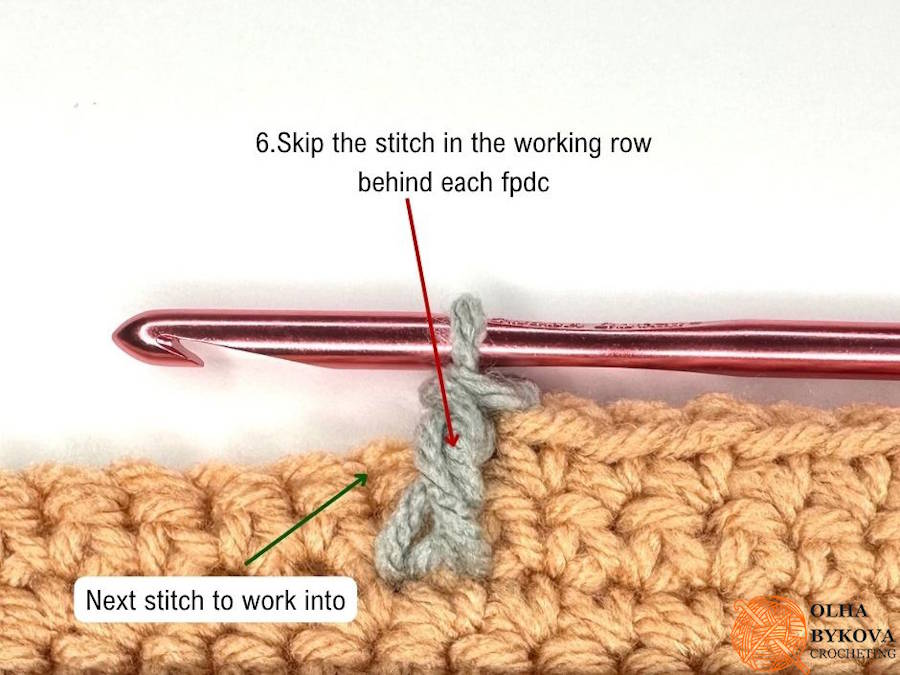
Why you need to skip stitches behind fpdc
When working fpdc, it’s important to understand that the stitch is not just decorative — it also occupies the space of a stitch in your working row.
Because fpdc is worked around the post of a stitch and not into the top two loops, those top loops remain free in the current row. However, even though they are visible and accessible, they should not be worked into.
No matter how the post stitch is made — straight or with a lean — fpdc still replaces one stitch in the working row. This means that the stitch behind it must be left unworked.
If you don’t skip that stitch:
- your stitch count will increase
- the fabric may become distorted
- the texture will look uneven
How to crochet left and right leaning front post double crochet stitches
Fpdc stitches can be worked not only straight, but also with a slight shift to the left or to the right. This is what creates diagonal lines, movement, and cable-like textures in crochet.
In most cases, fpdc is used to shift a stitch by one position forward or backward from the next stitch — the position it is meant to visually occupy in the fabric.
For larger shifts (2 or more stitches), fpdc is usually not enough. In those cases, designers typically use extended front post double crochet or front post treble crochet. These stitches are taller and allow you to reach further without distorting the fabric.
To create a leaning effect, the key is which post you work around and in what order you work the stitches.
- Fpdc leaning right is typically worked around the next stitch after skipping one stitch
- Fpdc leaning left is worked around a stitch that sits belowthe last stitch worked
This means you are intentionally changing the natural order of stitches to create a shift in the fabric.
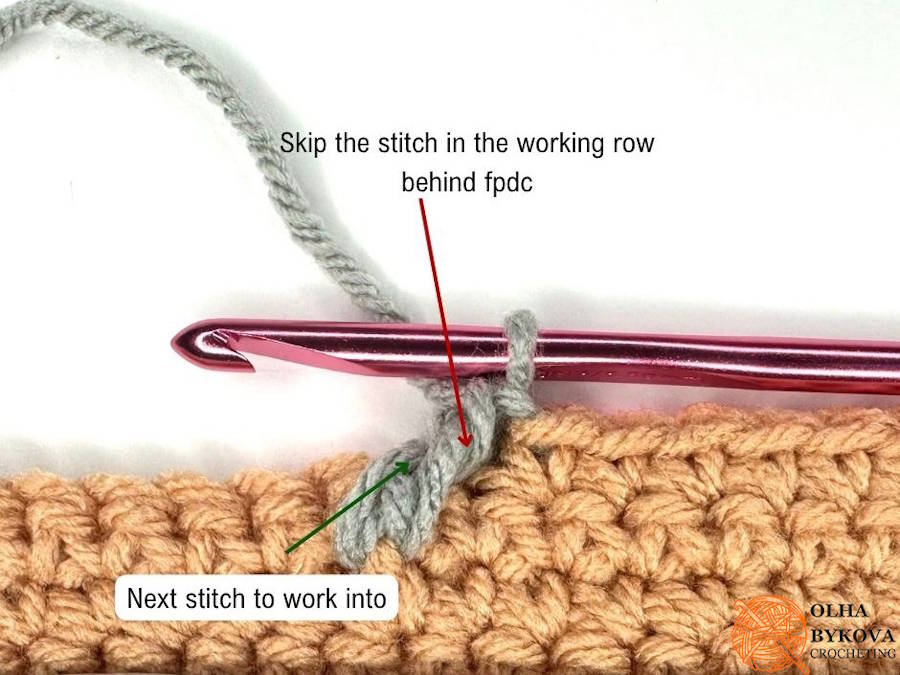
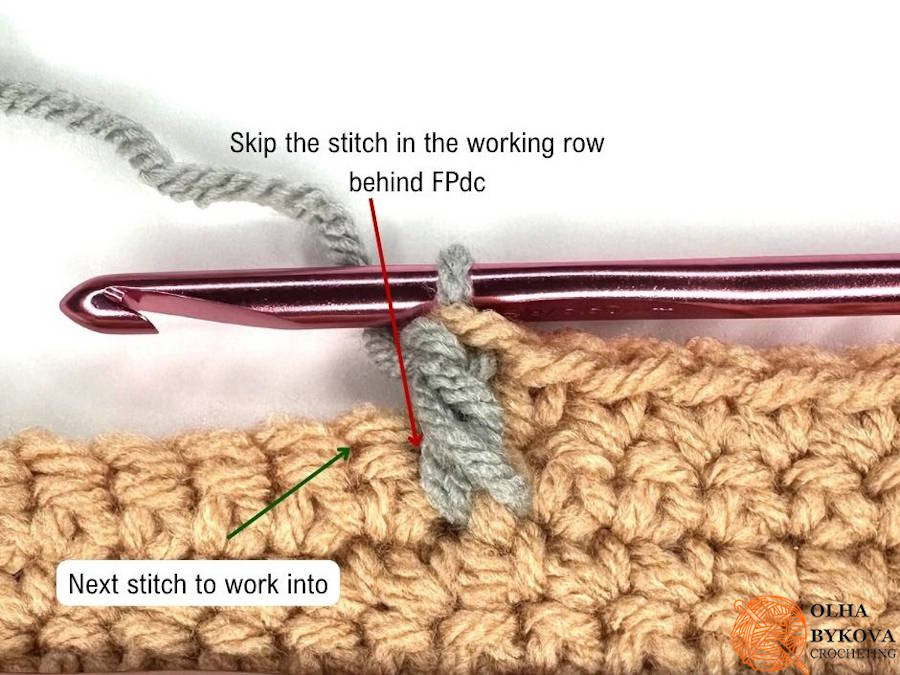
How to crochet right leaning (skipping 1 stitch and working around next stitch) front post double crochet
The stitch is worked out of order and moves forward, crossing over the skipped space and creating a right-leaning effect.
Skip 1 stitch in the working row.
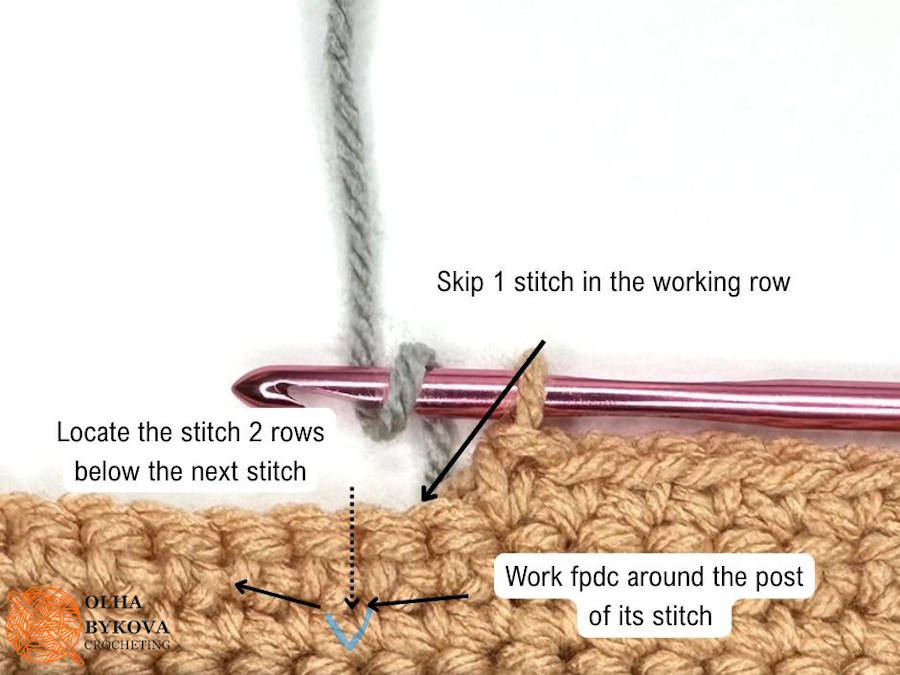
Then insert your hook around the next stitch and work fpdc as usual — this can be any type of stitch (sc, hdc, dc, fpdc, fptr)
How to crochet left leaning (worked 2 rows below last stitch worked) front post double crochet
The stitch is worked out of order and sits slightly behind, which makes it shift backward in the fabric and creates a left-leaning effect.
Locate the stitch 2 rows below the last stitch worked – this can be any type of stitch (sc, hdc, dc, fpdc, fptr):
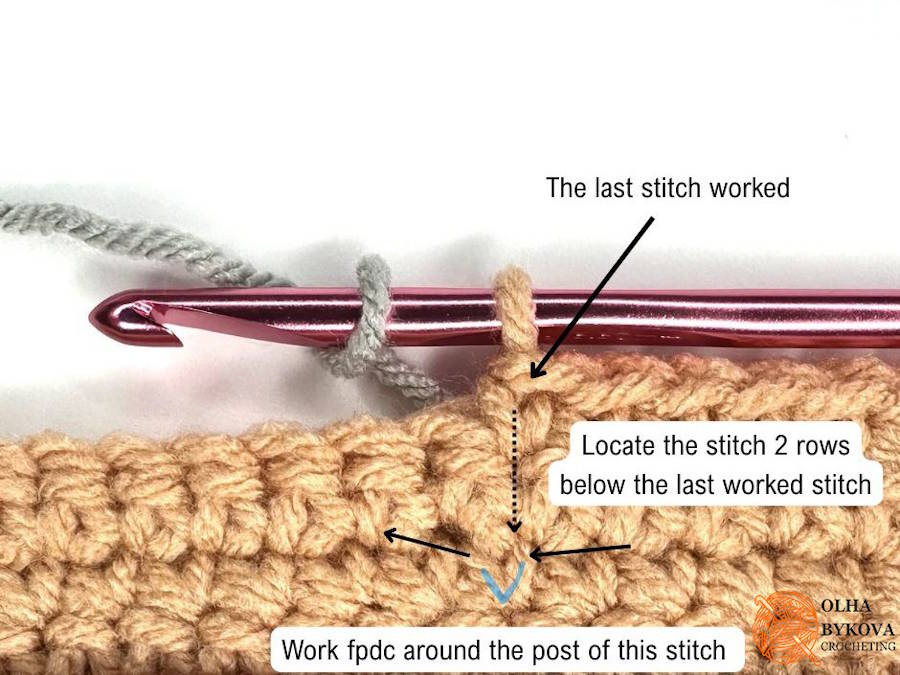
Then insert your hook around its post and work fpdc as usual:
The stitch is placed behind and shifts backward in the fabric.
Front post double crochet symbol in crochet charts (fpdc explained)
In crochet charts, fpdc is represented using a standard symbol from the international crochet chart system.
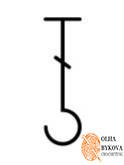
The symbol itself is based on the double crochet symbol, but it shows that the stitch is worked around the post rather than into the top loops.
Depending on its position in the chart, the symbol may appear:
- straight
- leaning to the right
- leaning to the left
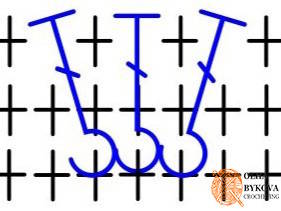
The direction of the symbol indicates how the stitch is worked and how it will appear in the fabric.
Crochet charts also clearly show which stitch the fpdc should be worked around, making it easier to understand stitch placement, even in more complex patterns.
Learning to read these symbols will help you quickly recognize how fpdc is used and how it shapes the overall texture of the design.
Tips and troubleshooting
Working fpdc becomes much easier once you understand how the stitch is constructed. If something feels off, it’s usually related to placement, tension, or stitch order.
Tips for better results
- make sure you are working around the post
- keep your tension slightly relaxed so the hook can move easily around the post
- pull your loops a little higher than usual to add height and prevent the fabric from curling inward
- use lighter yarn colors to clearly see stitch structure
- take a moment to identify the correct stitch before inserting your hook
Common problems and how to fix them
Stitch count is incorrect
You may not be skipping the stitch behind fpdc. Remember that fpdc replaces one stitch in the row.
Fabric looks uneven or distorted
Check your stitch placement and make sure you are working around the correct post.
Fabric is twisting or leaning to one side
This usually happens when stitches are not balanced — for example, working too many fpdc in one direction (left or right) or placing stitches incorrectly.
Make sure you follow the correct stitch order and balance left- and right-leaning stitches when required.
Stitches are too tight
Try loosening your tension or using a slightly larger hook.
Difficult to see where to insert the hook
Practice on a swatch using simple stitches (like dc) before moving to more complex textures.
Understanding these small details will help you crochet fpdc more confidently and achieve clean, consistent results in your projects.
Final thoughts
Front post double crochet (fpdc) is one of the most powerful stitches for creating texture in crochet. Once you understand how it works — from basic placement to direction and stitch structure — you can start using it to build more complex and visually interesting designs.
Like any technique, fpdc becomes much easier with practice. The more you work with it, the more intuitive stitch placement and direction will feel.
If you’d like to practice and see how fpdc works in real projects, explore my crochet patterns where this stitch is used in different ways — from simple textures to more structured designs.
These patterns will help you build confidence and better understand how fpdc behaves in finished pieces.
TUTORIAL REMINDERS
- This tutorial is intended for personal use only. Reproduction, distribution, or commercial use without the designer’s permission is not allowed.