Cable weave crochet hEADBAND – Free crochet PATTERN
Looking for a handmade gift that feels a little extra special? This crochet headband pattern combines a rich, dimensional texture with the warmth and comfort of a cozy crochet ear warmer. The intricate woven design gives it an elegant, polished look, making it a thoughtful gift for someone you love — or a beautiful addition to your own cold-weather wardrobe.
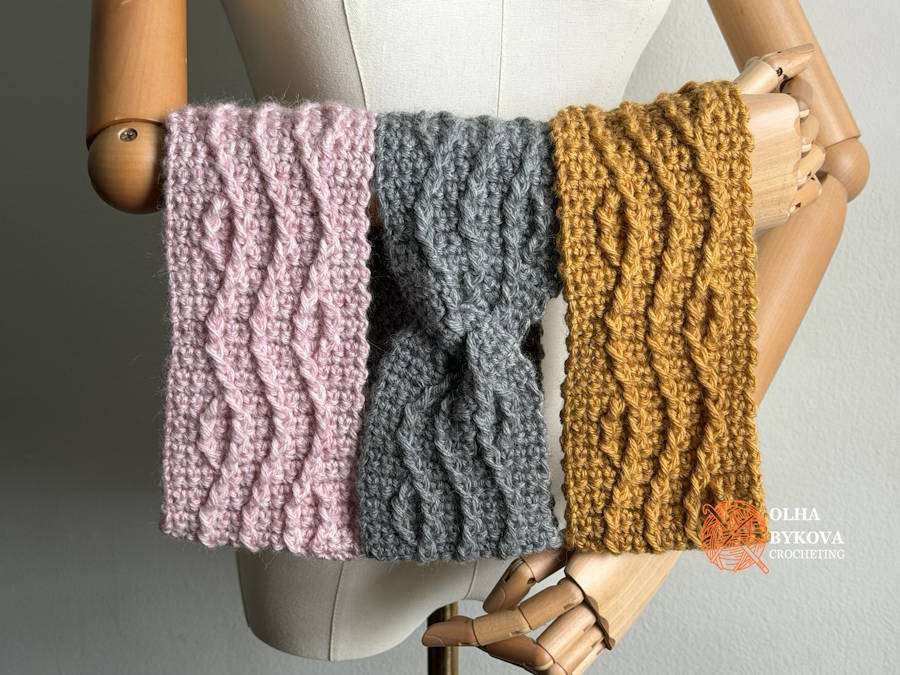
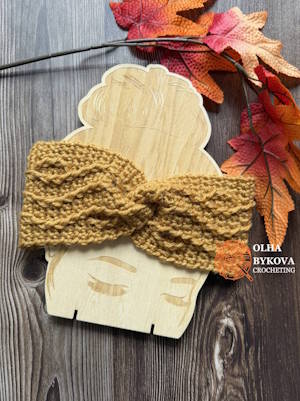
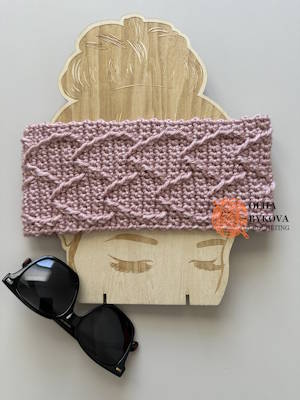
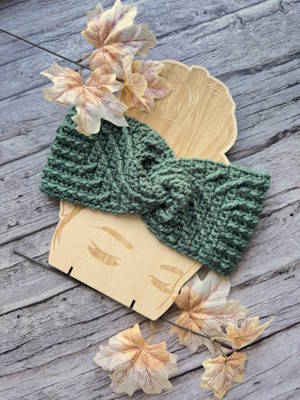
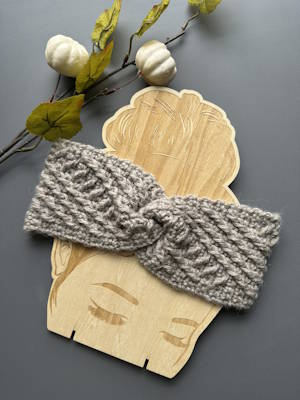
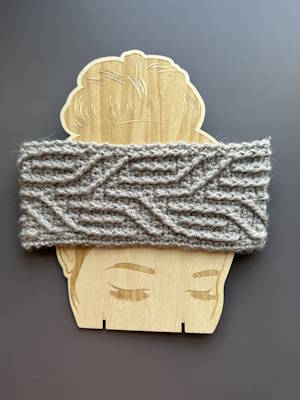
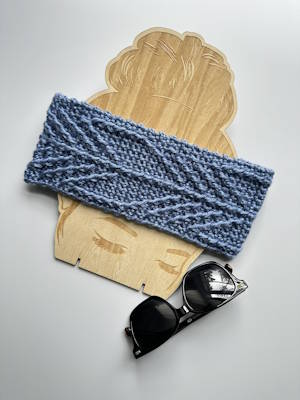
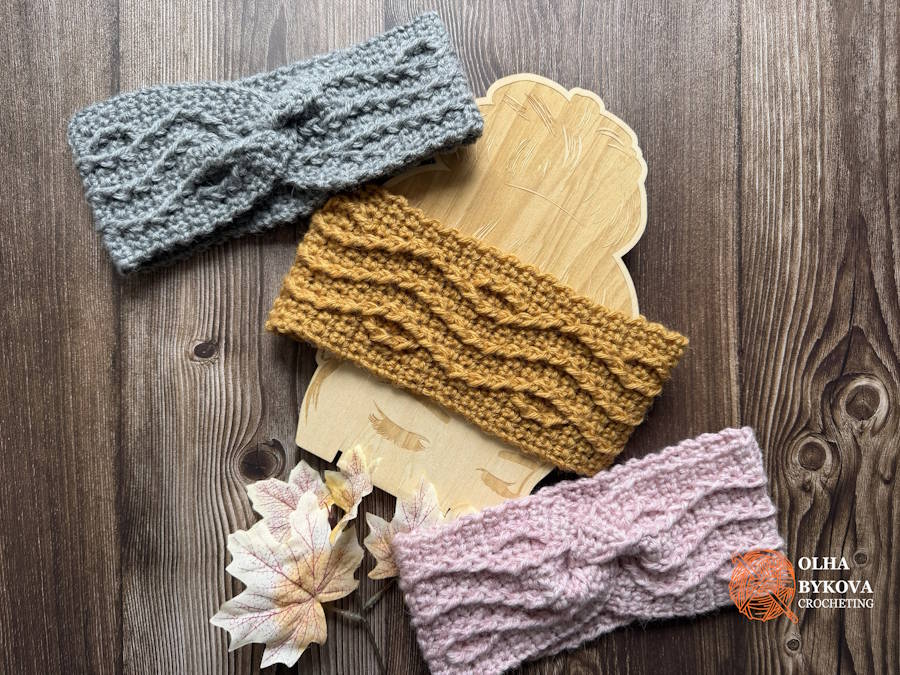
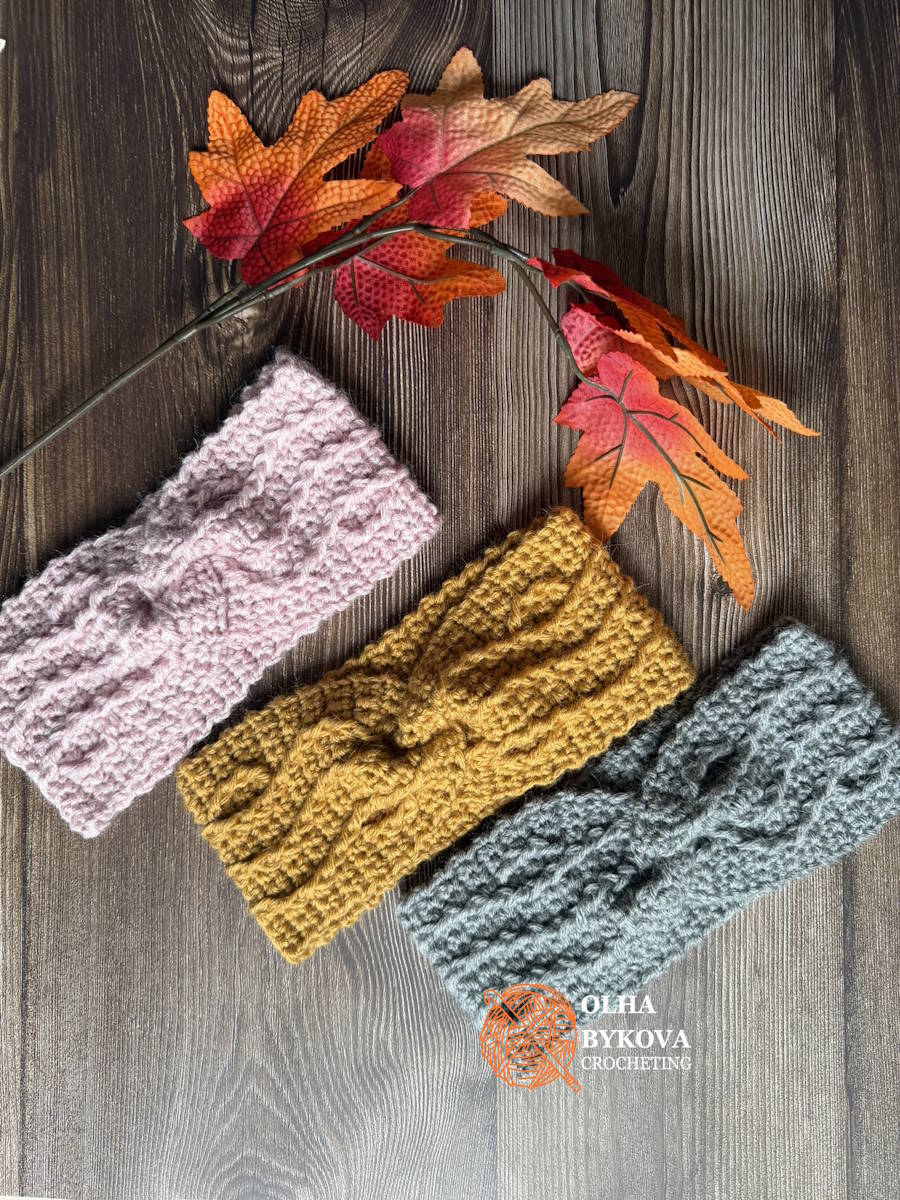
Free cable crochet ear warmer pattern with three textured headbands in different colors
This pattern is part of the 2026 Yarnsgiving Community Projects, organized by the Crochet Guild of America in support of the Craft Yarn Council’s Yarnsgiving campaign. Yarnsgiving celebrates the joy of making with yarn and giving to others during the Thanksgiving and holiday season, bringing together makers, designers, and the yarn community through projects created to be shared.
For my Yarnsgiving project, I chose the Cable Weave Headband because handmade gifts don’t have to be large or time-consuming to feel special. A small accessory can still showcase beautiful craftsmanship, interesting texture, and the care that goes into making something by hand for another person.
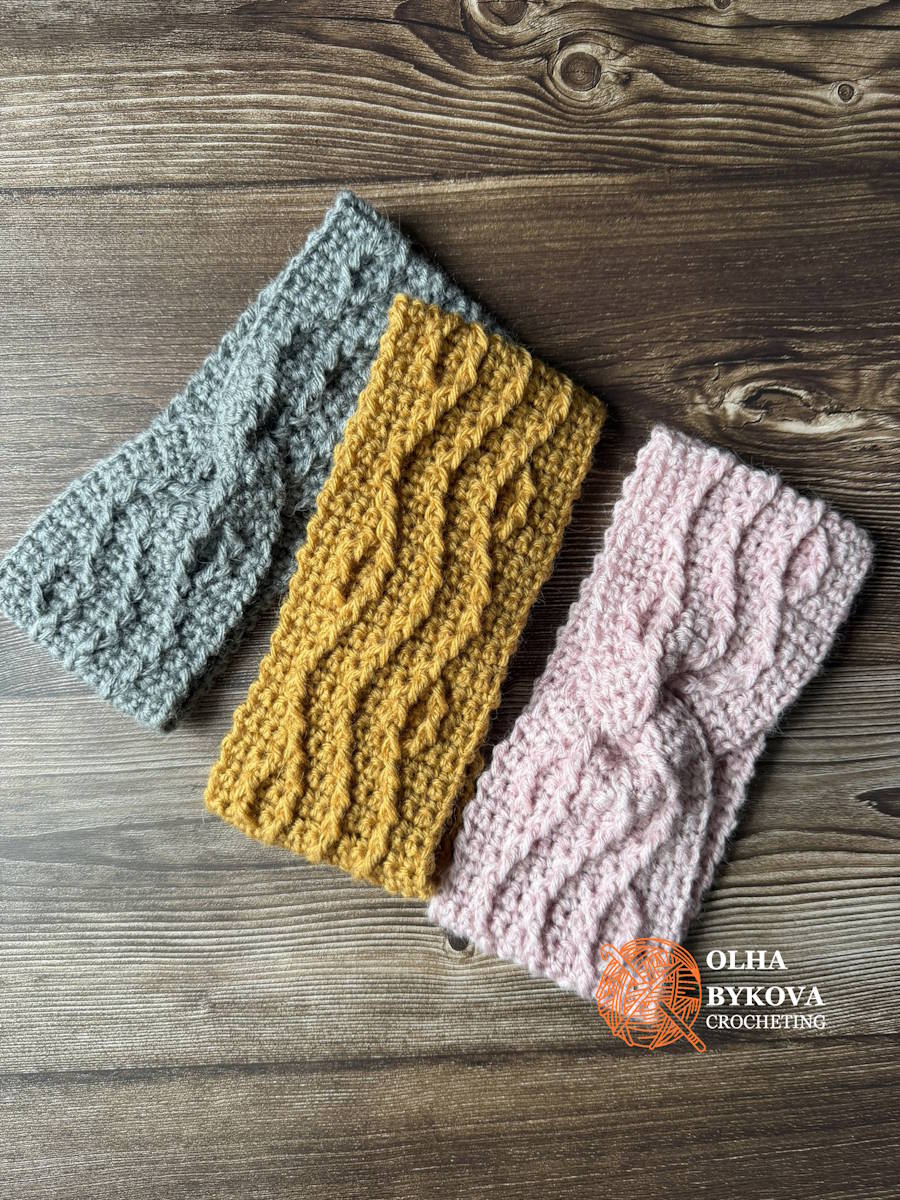
Free cable crochet headband pattern shown in blush pink, golden yellow, and gray
I crocheted my Yarnsgiving version using colors from the suggested 2026 Yarnsgiving color palette. The yarn’s warmth and stitch definition work beautifully with the raised woven texture of the design, while the rich shades give the headband a cozy seasonal feel.
Whether you make one as a holiday gift, a small gesture of appreciation, or simply because someone could use a little handmade warmth, I hope this pattern inspires you to make something meaningful and pass that warmth along.
Learn more about Yarnsgiving and discover more projects from the yarn community at Yarnsgiving.com
ABOUT CABLE WEAVE HEADBAND PATTERN
If you’ve been wondering how to crochet a headband that looks intricate but is easy to customize, this pattern is a great project to try.
Cable crochet headband directions for making the textured design with a straight or twisted finish
This headband is worked flat in turning rows from the bottom up, making it easy to customize the fit for just about anyone — no extra calculations or pattern adjustments needed. Simply keep crocheting until you reach the length needed for a comfortable fit. The textured cable design is worked entirely on the right side, while the wrong-side rows give you a little break between the more interesting ones.
Once you’ve reached your desired length, simply join the ends together. You can seam them straight for a classic headband or add a twist for a different look — the choice is yours!
Skill Level – Intermediate
Stitches Used:
- chain (ch)
- turning chain (tch)
- a step-by-step photo tutorial
- single crochet (sc)
- front post double crochet (fpdc)
Terminology – US crochet terms are used throughout the pattern.
FINISHED SIZE
Head circumference: 21–22” (54–56 cm)
Finished width: 4” (10 cm)
Finished length (before seaming): 20” (51 cm)
I chose this size because it fits most women comfortably. If you need a different size, use a different yarn, or your gauge differs from mine, the finished measurements of the headband may vary. To ensure a comfortable fit, stop crocheting when the headband measures approximately 2 in (5 cm) less than the intended head circumference. The fabric is designed to stretch for a snug, comfortable fit.
MATERIALS
The Cable Weave Headband was designed with Lion Brand Touch of Alpaca to showcase the intricate texture that defines this pattern. The yarn offers excellent stitch definition, allowing every detail of the woven design to stand out beautifully while creating a soft, warm fabric that’s comfortable to wear. One of the things I enjoy most about working with this yarn is how the same textured design takes on a completely different personality simply by changing the color.
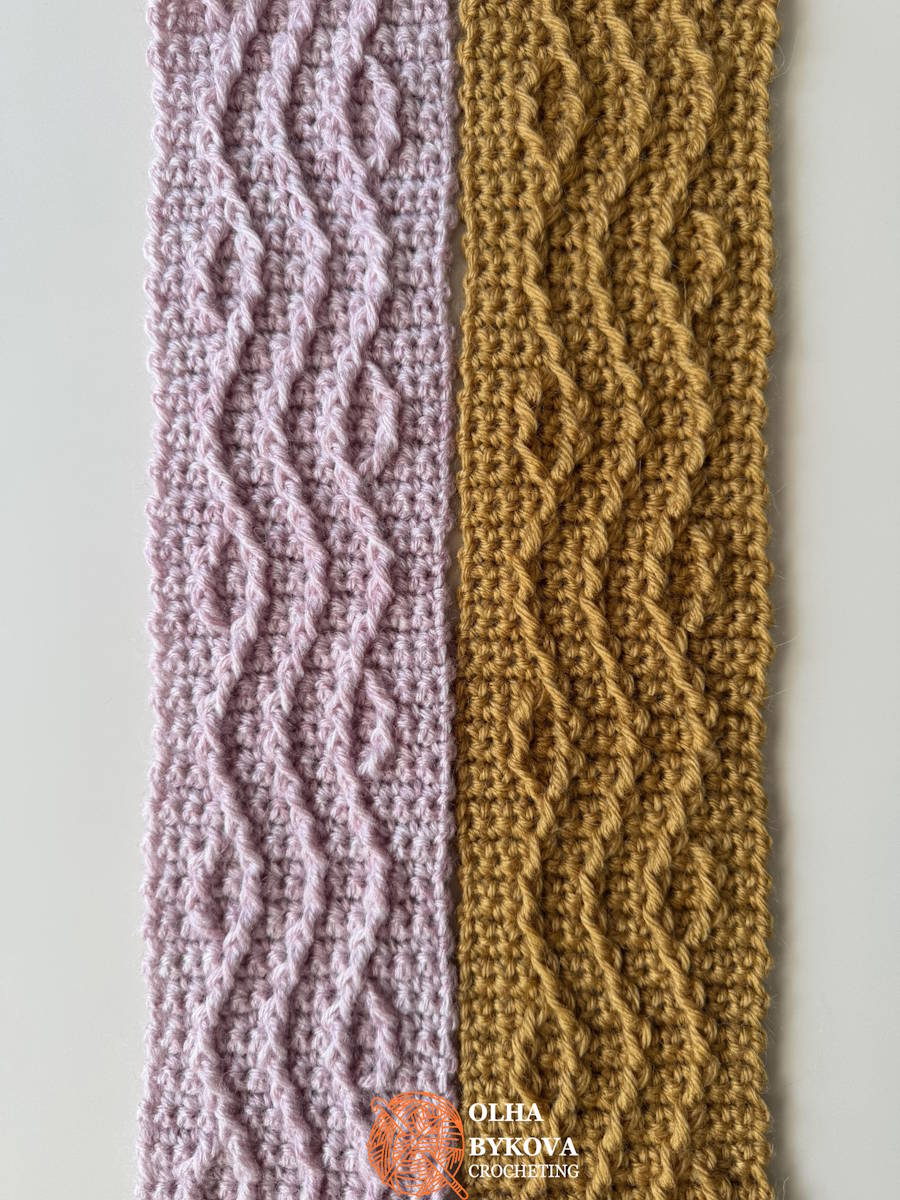
With its versatile color palette, it’s easy to create accessories that feel both elegant and timeless.
YARN: Lion Brand Yarn, Touch of Alpaca (90% Acrylic, 10% Alpaca; #4 medium / worsted weight; 100 g / 190 m [3.5 oz / 207 yds] per skein), color Goldenrod – approx. 44 g (84 m/91 yds/1.55 oz) used.
For the other headbands, I used the same yarn in Oxford Grey and Blush Rose.
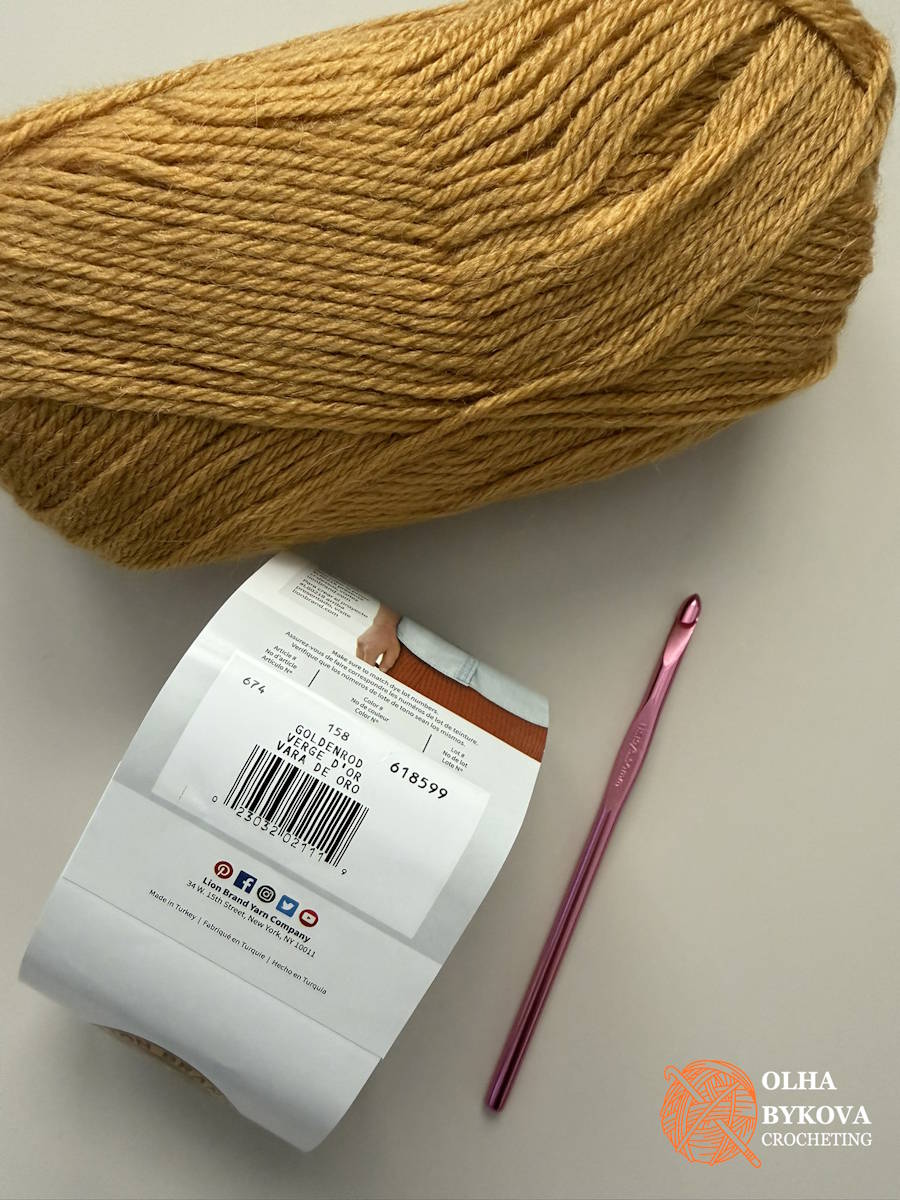
If you’d like to substitute the yarn, Lion Brand Heartland is another wonderful choice thanks to its softness and beautiful heathered colors, while Lion Brand Wool-Ease adds extra warmth and durability for colder weather. Of course, this pattern also works beautifully with almost any solid-colored worsted-weight yarn, so feel free to use a favorite yarn from your stash and make it uniquely yours.
HOOK: US I-9 (5.5 mm) or a hook size appropriate for your chosen yarn.
NOTIONS: yarn needle, scissors, tape measure.
GAUGE
16 sts and 16 rows = 4” [10 cm] in textured pattern of front post stitches and sc using suggested hook. Gauge is measured after blocking. But don’t stress about matching it exactly — this design is forgiving, and the length can easily be adjusted for the perfect fit.
attern.
abbreviations
ch – chain
tch – turning chain
sc – single crochet
st(s) – stitch(es)
yo – yarn over
rep – repeat
cm – centimeter(s)
yd – yard(s)
g – gram(s)
RS – right side
WS – wrong side
[…] –repeat the stitches or sequence inside the brackets as many times as indicated
NOTES BEFORE YOU START
All front post stitches are worked around the post of a stitch 2 rows below.
Skip the stitch directly behind each fpdc in the current working row.
Throughout the pattern, “next fpdc” means to work around the next unworked front post double crochet 2 rows below.
To avoid distortion or curling of the fabric, make sure to work all front post stitches loosely and evenly. Excess tension on front post stitches can cause the pattern to lean or tighten.
CABLE WEAVE HEADBAND – WRITTEN INSTRUCTIONS
Follow the crochet headband directions below to create the textured cable design.
Ch 15
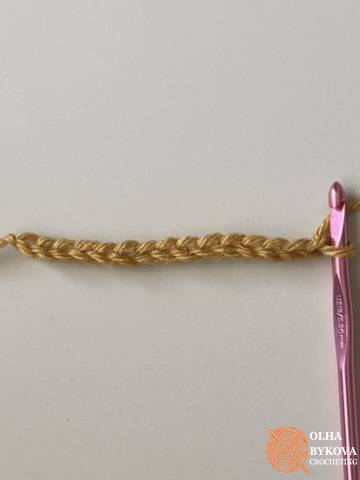
Setup Row 1: sc in 2nd ch from hook and in each ch across; turn. (14 sc)
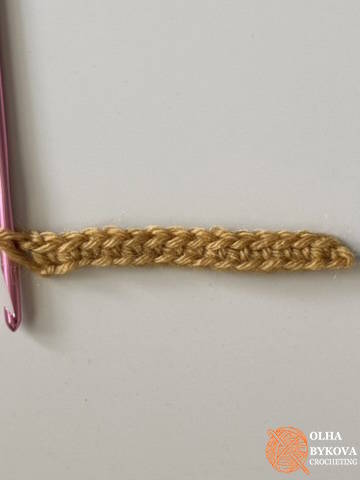
Setup Row 2: Tch 1, sc in first st and in each st across; turn. (14 sc)
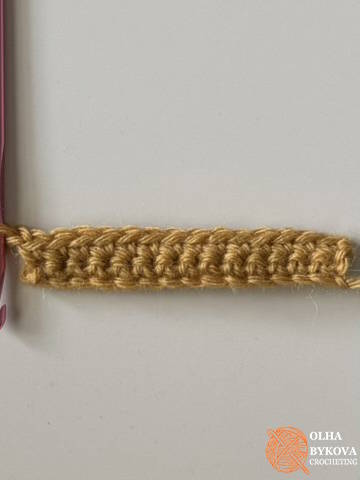
Setup Row 3 (RS): Tch 1, sc in first 2 sts,
[fpdc around next st 2 rows below, sk st behind, sc in next 2 sts] 4 times; turn. (4 fpdc, 10 sc)
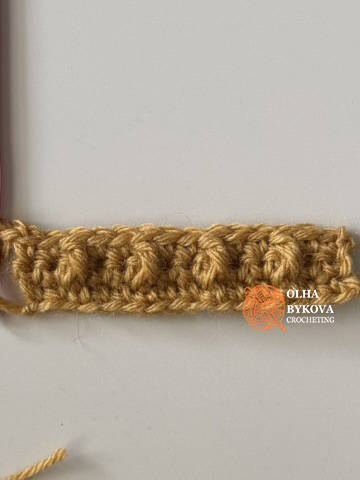
Row 4 (WS): Tch 1, sc in first st and in each st across; turn. (14 sc)
Row 5: Tch 1, sc in first 3 sts,
fpdc around first fpdc 2 rows below, sk st behind,
sc in next 2 sts,
fpdc around next fpdc 2 rows below, sk st behind,
sc in next 2 sts,
fpdc around each of last 2 fpdc 2 rows below, sk 2 sts behind,
sc in last 3 sts; turn. (4 fpdc, 10 sc)
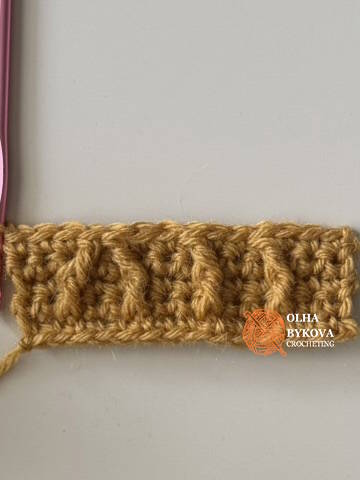
Row 6: Tch 1, sc in first st and in each st across; turn. (14 sc)
Row 7: Tch 1, sc in first 4 sts,
fpdc around first fpdc 2 rows below, sk st behind,
sc in next 2 sts
[fpdc around next fpdc 2 rows below, sk st behind, sc in next 2 sts] 2 times,
sk last fpdc 2 rows below,
sc in last st; turn. (3 fpdc, 11 sc)
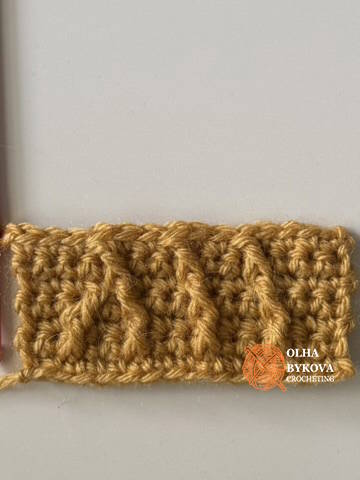
Row 8: Tch 1, sc in first st and in each st across; turn. (14 sc)
Row 9: Tch 1, sc in first 2 sts,
fpdc around sc before the next fpdc 2 rows below, sk st behind,
sc in next 2 sts,
fpdc around first fpdc 2 rows below, sk st behind,
sc in next 2 sts,
[fpdc around next fpdc 2 rows below, sk st behind, sc in next 2 sts] 2 times; turn. (4 fpdc, 10 sc).
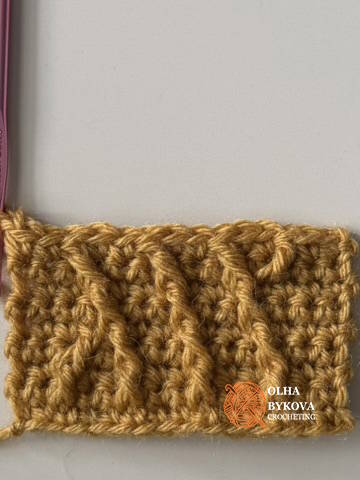
Row 10: Tch 1, sc in first st and in each st across; turn. (14 sc)
Row 11: Tch 1, sc in first 2 sts,
fpdc around first fpdc 2 rows below, sk st behind,
sc in next 2 sts,
[fpdc around next fpdc 2 rows below, sk st behind, sc in next 2 sts] 3 times;
turn. (4 fpdc, 10 sc)
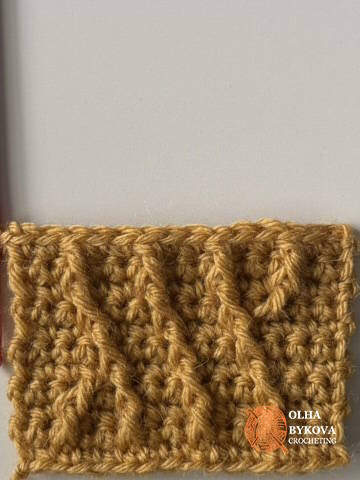
Row 12: Tch 1, sc in first st and in each st across; turn. (14 sc)
Row 13: Tch 1, sc in first 3 sts,
fpdc around each of first 2 fpdc 2 rows below, sk 2 sts behind,
sc in next 2 sts,
[fpdc around next fpdc 2 rows below, sk st behind, sc in next 2 sts] 2 times,
sc in last st; turn. (4 fpdc, 10 sc)
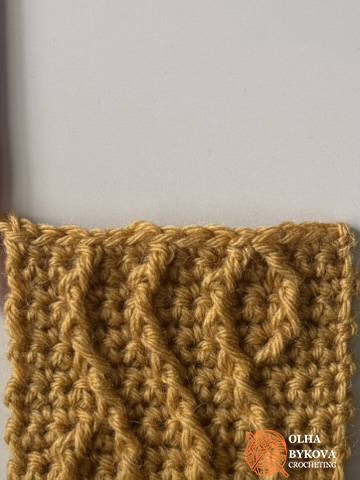
Row 14: Tch 1, sc in first st and in each st across; turn (14 sc)
Row 15: Tch 1, sc in first 3 sts,
sk first fpdc 2 rows below,
[fpdc around next fpdc 2 rows below, sk st behind, sc in next 2 sts] 3 times,
sc in last 2 sts; turn. (3 fpdc, 11 sc)
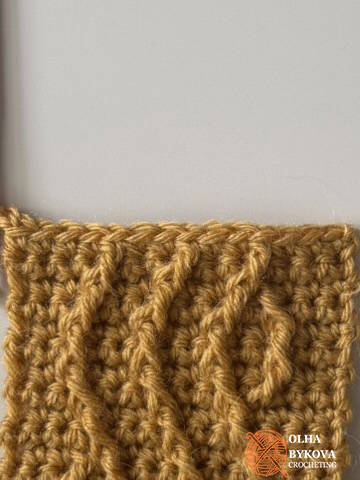
Row 16: Tch 1, sc in first st and in each st across; turn (14 sc)
Row 17: Tch 1, sc in first 2 sts,
fpdc around first fpdc 2 rows below, sk st behind,
sc in next 2 sts,
[fpdc around next fpdc 2 rows below, sk st behind, sc in next 2 sts] 2 times,
fpdc around sc after last fpdc 2 rows below, sk st behind,
sc in last 2 sts; turn. (4 fpdc, 10 sc)
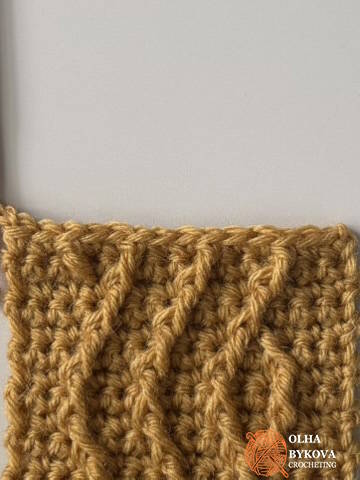
Row 18: Tch 1, sc in first st and in each st across; turn. (14 sc)
Row 19: Tch 1, sc in first 2 sts,
fpdc around first fpdc 2 rows below, sk st behind,
sc in next 2 sts,
[fpdc around next fpdc 2 rows below, sk st behind, sc in next 2 sts] 3 times; turn. (4 fpdc, 10 sc)
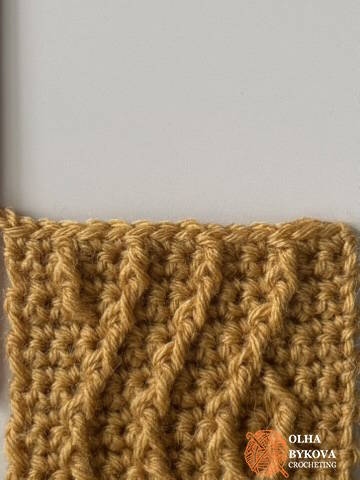
Rep Rows 4–19 until the length of the headband before seaming reaches 20” [51 cm] or to your desired length for a comfortable fit.
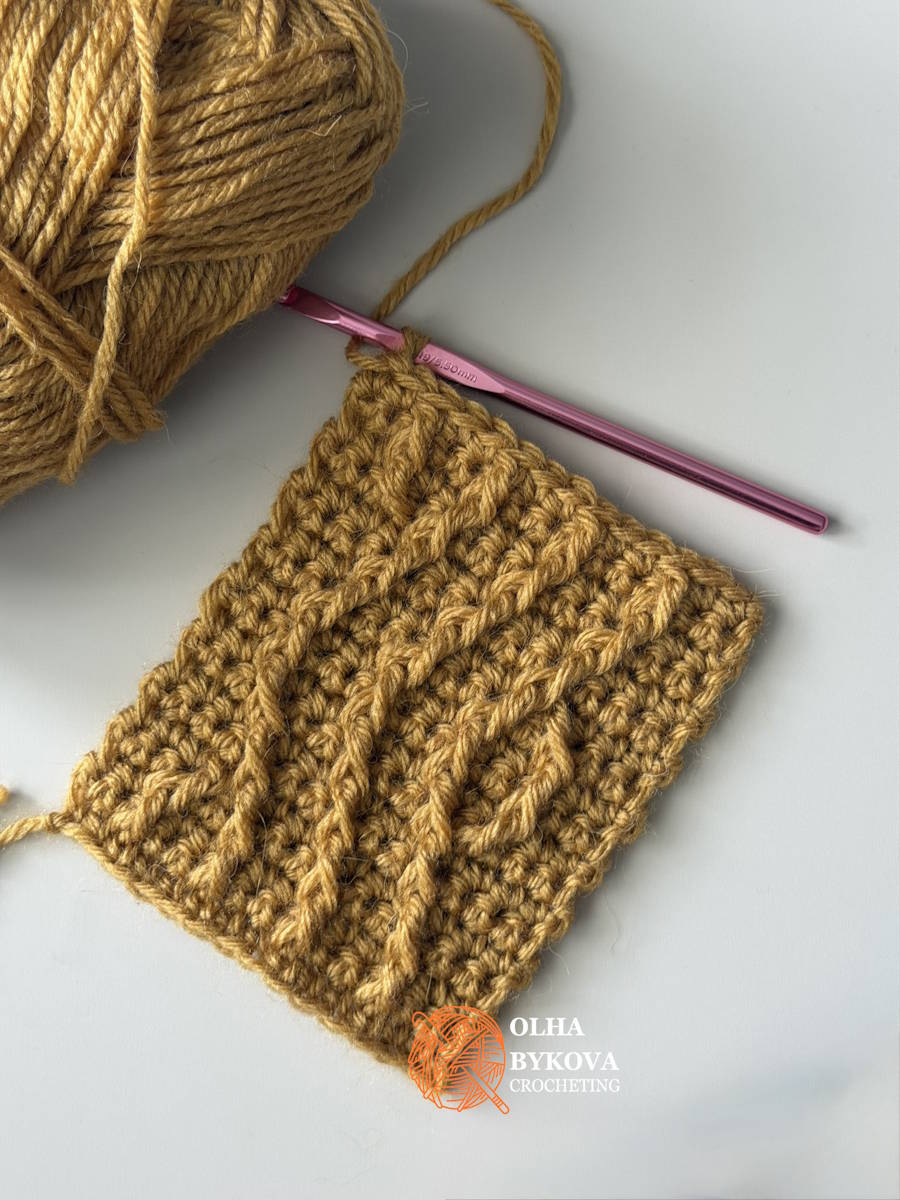
CHART
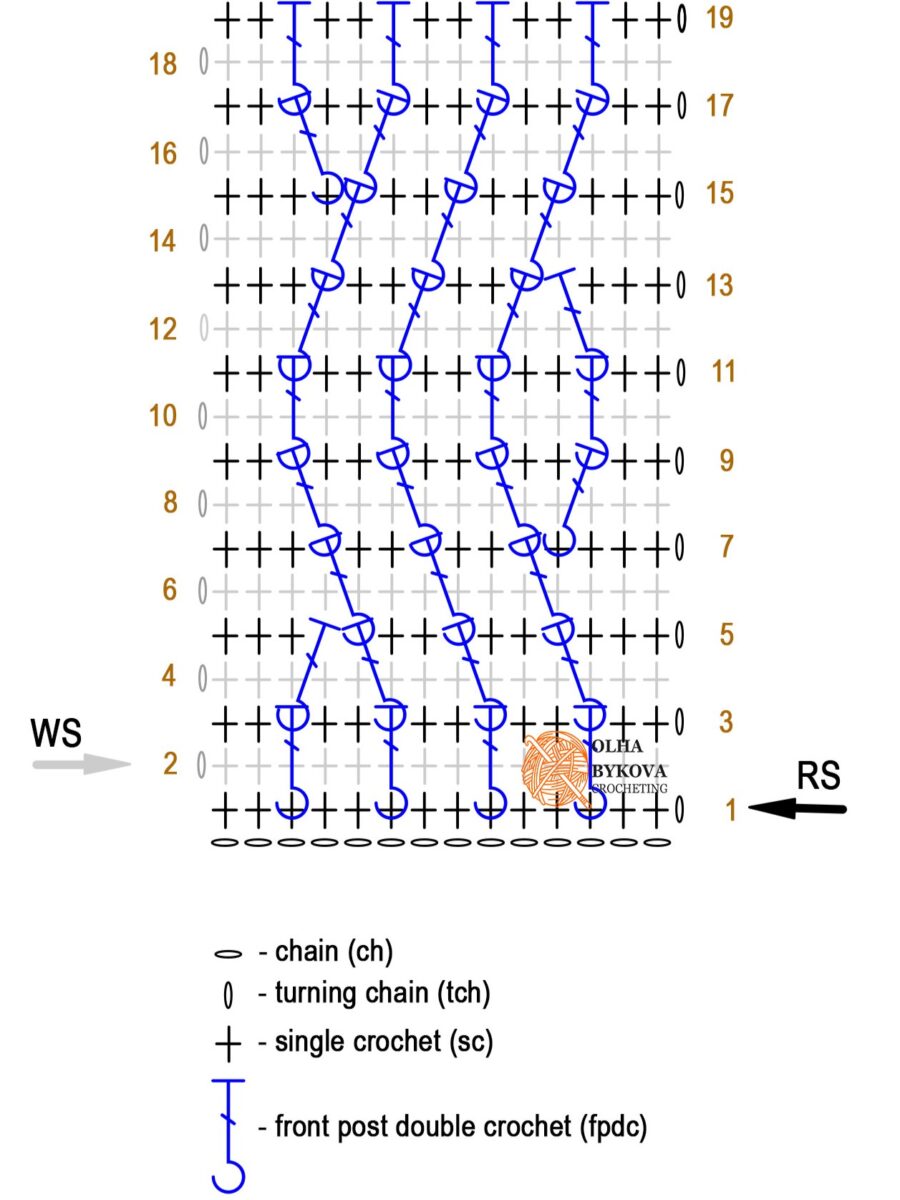
The diagram shows the stitch repeat for Rows 4–19. Read RS rows from right to left and WS rows from left to right.
Fasten off, leaving a 10″ tail for seaming.
Once you’ve reached the desired length, choose one of the finishing options below to turn the flat piece into your finished crochet ear warmer.
FINISHING (Straight headband)
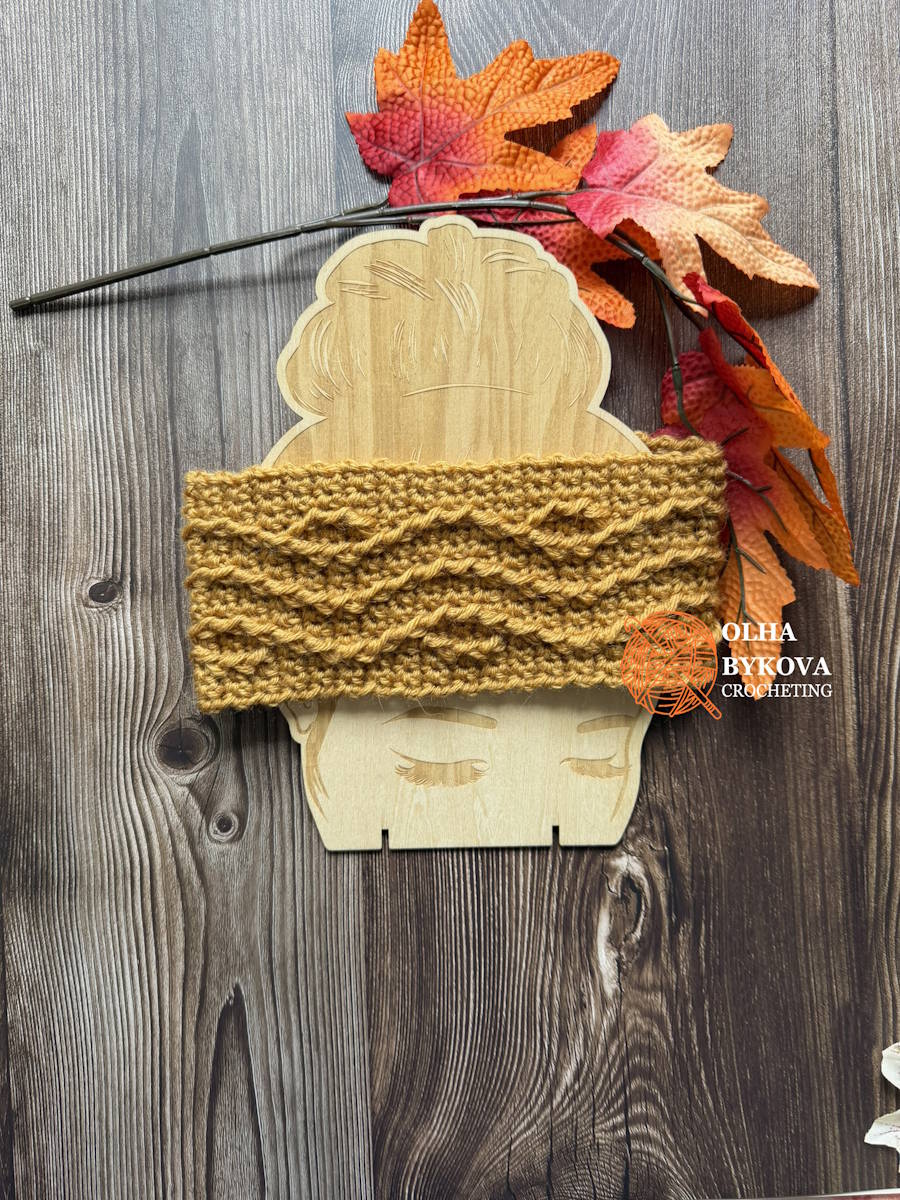
With yarn needle, seam short ends together using an invisible seam. Fasten off and weave in ends.
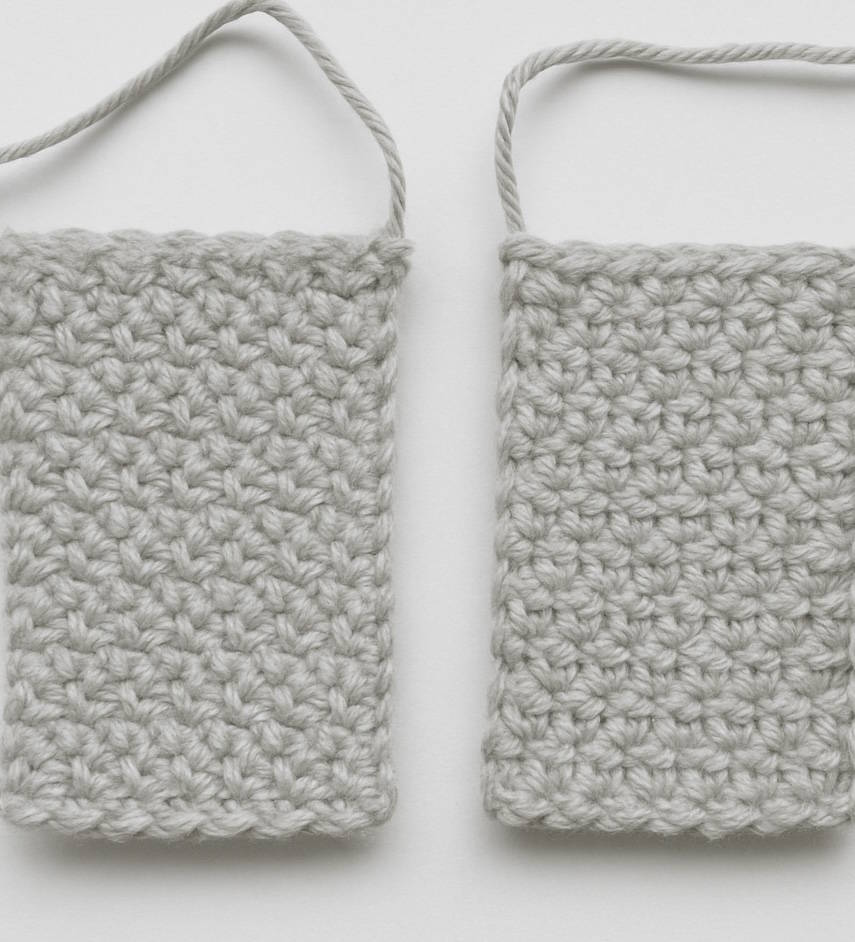
FINISHING (Twisted headband)
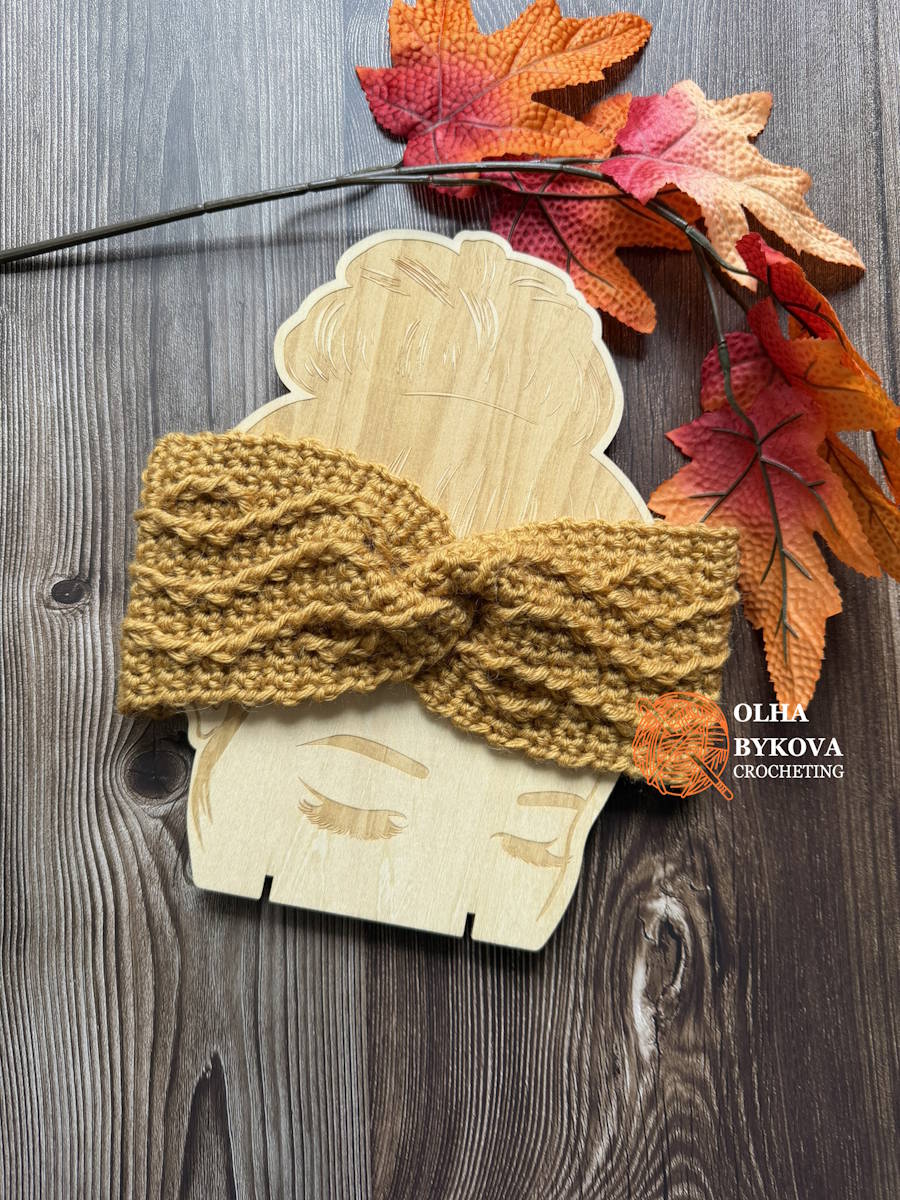
Fold each short end in half with right sides together, nest the folded ends into each other, and seam through all layers with a yarn needle using mattress stitch.
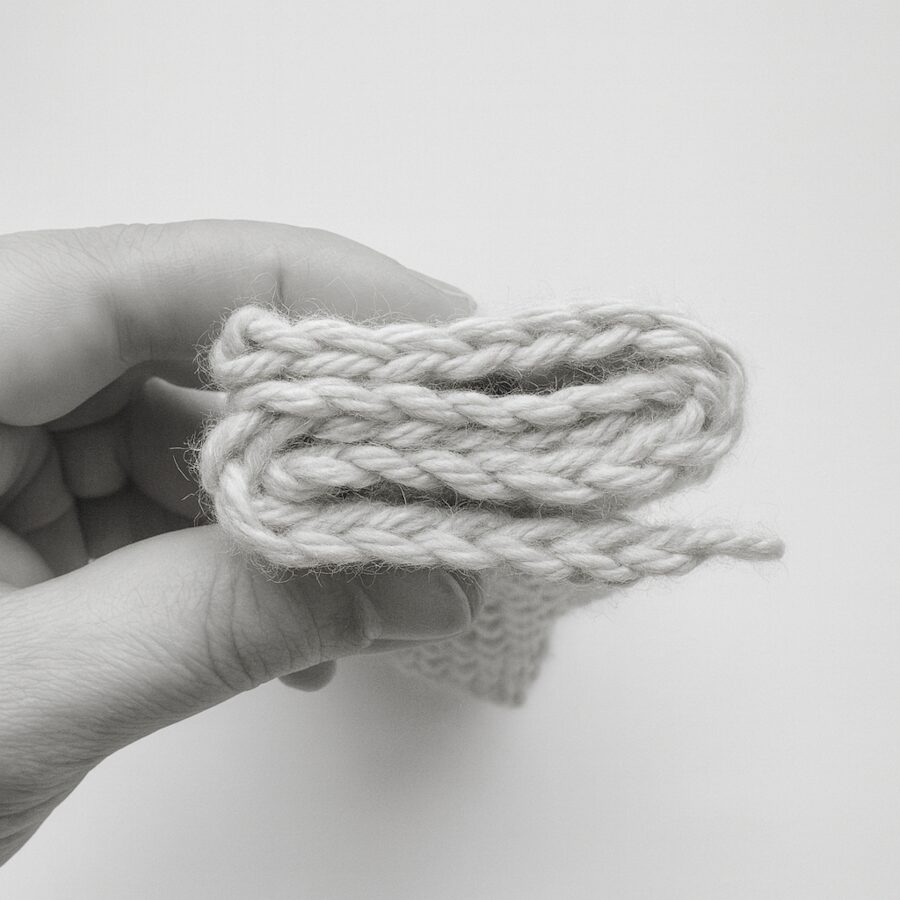
Gently wet block the finished piece, shape it, and lay flat on a clean surface to dry.
Care for the finished piece according to the yarn label instructions.
Enjoy your creation! Whether you wear it, gift it, display it, or sell the finished product. Let it bring joy and comfort.
Did You Spot Something I Missed?
I do my best to make every pattern as clear and accurate as possible, but I’m human, and occasionally something may slip through. If you notice an error, a typo, or anything that doesn’t seem quite right, please let me know! I’ll be genuinely grateful that you took the time to point it out, and I’ll make sure to correct it as soon as I can.
You can reach me at [email protected] — please include the pattern name and, if possible, the row or section where you noticed the issue.
Thank you for helping me make this pattern better for everyone who crochets it after you. ❤️
Pattern Reminders
- This free pattern is intended for personal use only. Reproduction, distribution, or commercial use without the designer’s permission is not allowed.
- You may sell finished items made using this pattern, but please credit the designer: Olha Bykova Crocheting.
- Share your finished projects! I love seeing how you bring this pattern to life. Tag your photos with #OlhaBykovaCrocheting on social media.
- For any questions about the pattern or techniques used, please refer to the stitch glossary or contact the designer.
Support my work and enjoy an easy, well-structured crochet experience you’ll love!
Wishing you many happy stitches and lots of joyful crocheting!
Loved this pattern? Take a look at my other textured and aran crochet patterns — each one made to bring a touch of cozy handmade charm to your next project.