THE PUMPKIN CUP COZY – FREE CROCHET PATTERN
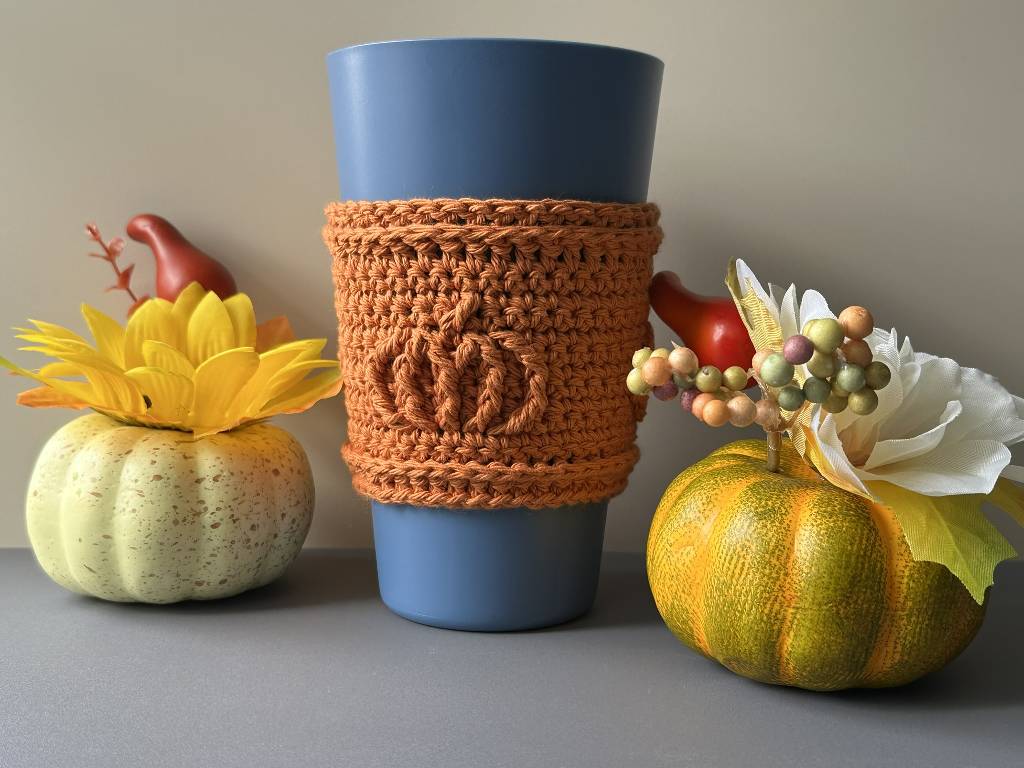
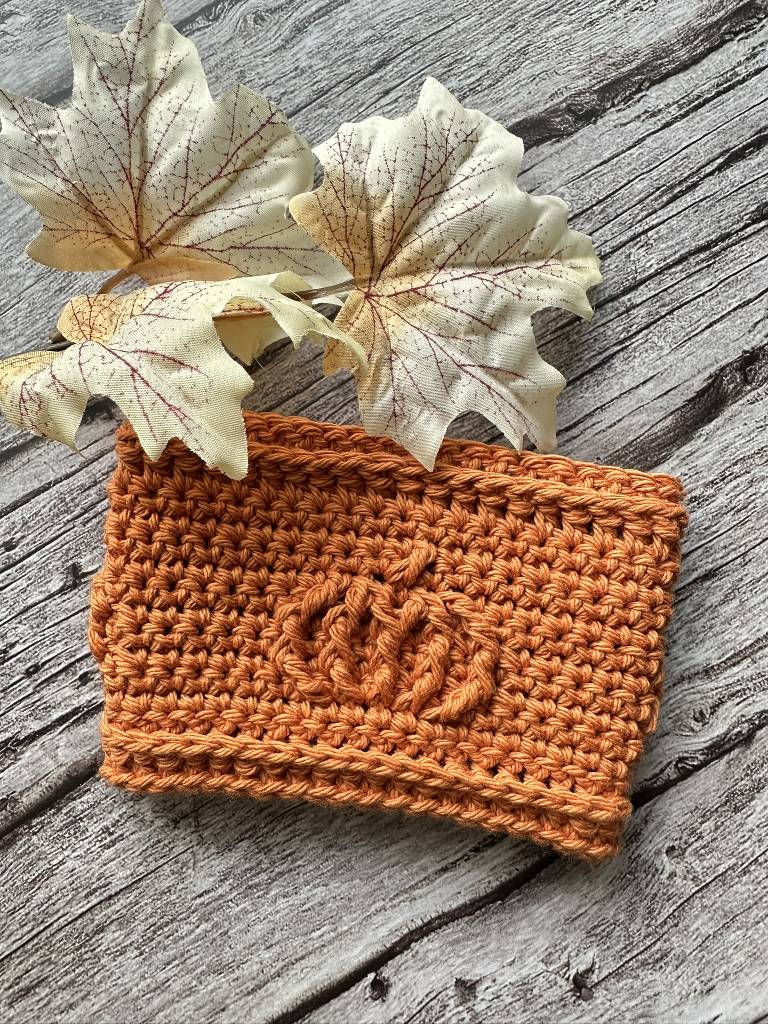
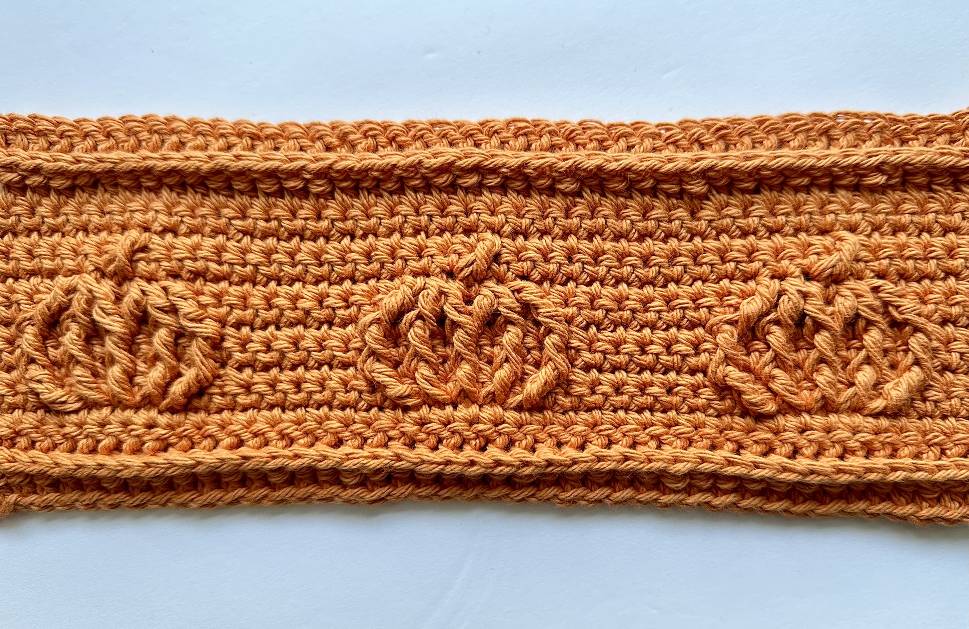
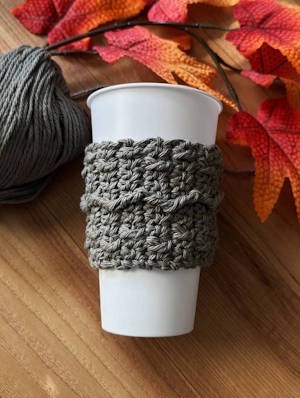
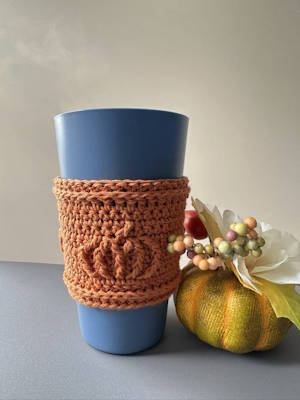
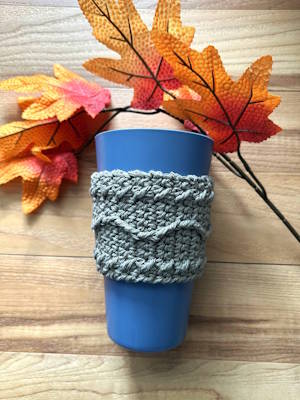
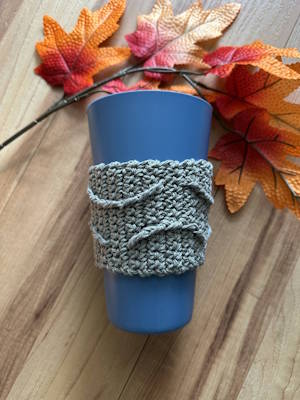
Wrap your favorite fall drink in the cozy warmth of the season with The Pumpkin Cup Cozy — a handmade crochet sleeve featuring a textured pumpkin design. Perfect for keeping your hands comfortable while sipping pumpkin spice lattes, hot cocoa, or coffee on crisp autumn days.
This reusable cup sleeve is designed to fit a 20 oz / 591 ml “Venti” cup, making it ideal for Starbucks cups, travel mugs, and most reusable tumblers. The cozy not only protects your hands from heat but also adds a festive handmade touch to your beverage routine. Each cup cozy is crocheted with premium cotton yarn in a rich pumpkin color — durable, eco-friendly, and machine washable. Whether you use it yourself or gift it to a coffee-loving friend, it’s a perfect accessory for the fall season, Thanksgiving, or Halloween.
✨ Features:
- Fits 20 oz / 591 ml “Venti” cups
- Textured crochet pumpkin design
- Handmade with 100% cotton yarn
- Reusable and eco-friendly
- Ideal for hot or cold drinks
🎃 Perfect for:
Fall vibes • Pumpkin spice lattes • Thanksgiving gifts • Coffee lovers • Handmade crochet accessories
Size:
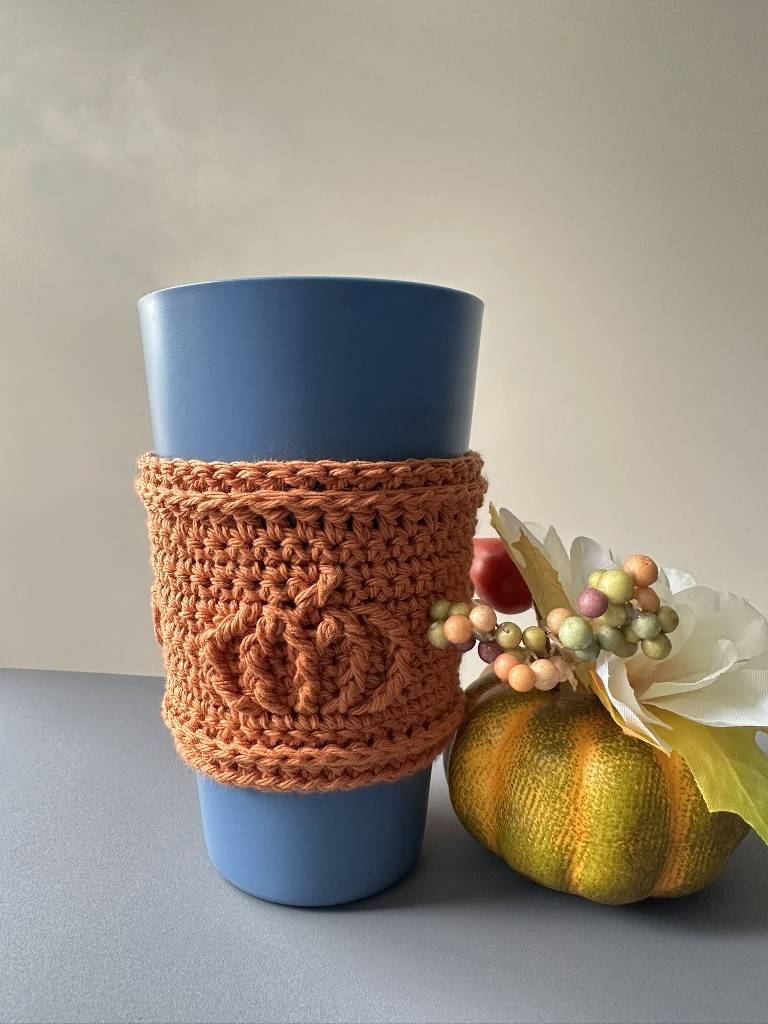
Fit a 20 oz / 591 ml “Venti” cup
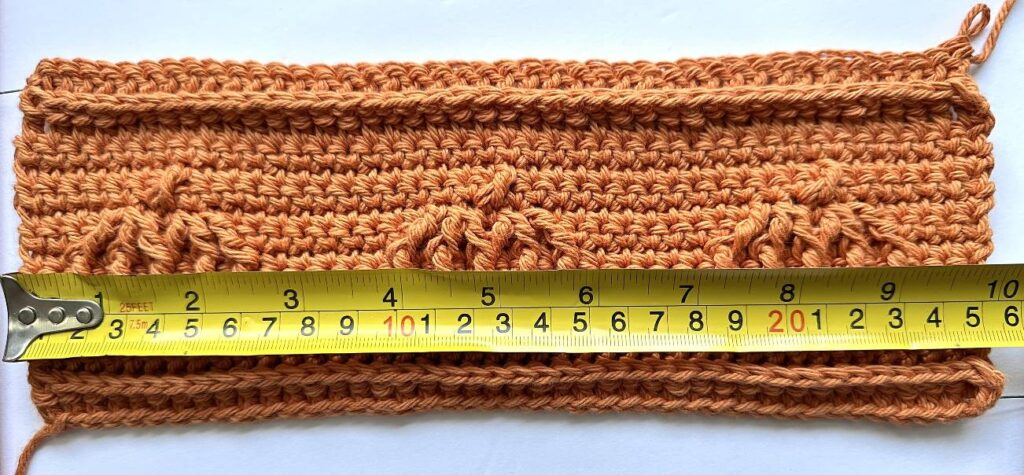
Finished width: 3.5 in [9 cm].
Finished length: 10 in [25 cm].
Skill level:
Intermediate (requires familiarity with front post stitches).
Terminology:
US crochet terms.
Materials:
Yarn: Crafter’s Secret, Cotton (100% Cotton; #4 Medium / Worsted Weight; 71 g / 109 m [2.5 oz / 120 yd] per skein), color PAPAYA – approx. 31 g (48 m/52 yd/1.09 oz) used.
Crafter’s Secret Cotton is a medium-weight (Category 4) 100% cotton yarn, known for its soft yet sturdy texture that holds shape beautifully — ideal for cup cozies, mug sleeves, and small seasonal crochet projects.
This yarn offers excellent stitch definition, making textured patterns like front post stitches and ribbed designs stand out clearly.
Because it’s absorbent and heat-resistant, it’s a perfect choice for coffee cozies, kitchen accessories, and handmade Halloween décor.
Its vibrant, durable colors stay rich after washing, bringing your autumn palette of pumpkins, acorns, and fall leaves to life.
Use it when you want your cup cozy to feel cozy, eco-friendly, and reusable — a sustainable alternative to disposable sleeves.
Yarn Substitutes for Crafter’s Secret Cotton If Crafter’s Secret Cotton is unavailable, you can use one of the following equivalent 100% cotton yarns.
Each option has a very similar weight, yardage, and texture — perfect for cup cozies, dishcloths, and small crochet projects.
1. Lily Sugar’n Cream
- Fiber Content: 100% Cotton
- Weight: 2.5 oz (70.9 g)
- Length: 120 yd (109.7 m)
- Yarn Weight: Medium (4) – Worsted
- Available at: Hobby Lobby, Michaels, Walmart, and online
2. Peaches & Creme
- Fiber Content: 100% Cotton
- Weight: 2.5 oz (70.9 g)
- Length: 120 yd (109.7 m)
- Yarn Weight: Medium (4) – Worsted
- Available at: Walmart and online
3. Loops & Threads Classic Cotton
- Fiber Content: 100% Cotton
- Weight: 2.5 oz (70.9 g)
- Length: 120 yd (109.7 m)
- Yarn Weight: Medium (4) – Worsted
- Available at: Michaels and online
All of these yarns have a similar feel, thickness, and stitch definition to Crafter’s Secret Cotton, making them perfect substitutes for your crochet projects.
HOOK: US G-6 (4.0 mm) or size needed to obtain gauge.
NOTIONS: yarn needle, scissors, tape measure.
Abbreviations:
ch – chain
sc – single crochet
dc – double crochet
st(s) – stitch(es)
yo – yarn over
rep – repeat
cm – centimeter(s)
yd – yard(s)
g – gram(s)
RS – right side
WS – wrong side
[…] – repeat the stitches or sequence inside the brackets as many times as indicated
(…) – indicate the stitch around which the front post (or back post) stitch is worked
Stitches:
ch (chain): yo and draw the yarn through to form a new loop without tightening the previous one.
sc (single crochet): insert the hook into a stitch, yo and draw up a loop, yo again and draw through both loops on the hook.
dc (double crochet): yo, insert hook into the indicated stitch, yarn over again and pull up a loop (3 loops on hook); yo and pull through the first 2 loops on the hook (2 loops remain); yo once more and pull through both remaining loops on the hook.
Special stitches:
FPdc (front post double crochet): yo, insert your hook from front to back to front around the post of the stitch 2 rows below and pull up a loop; yo and draw through 2 loops, yo and draw through the remaining 2 loops on the hook. Always skip the stitch behind each FPdc. Full tutorial here
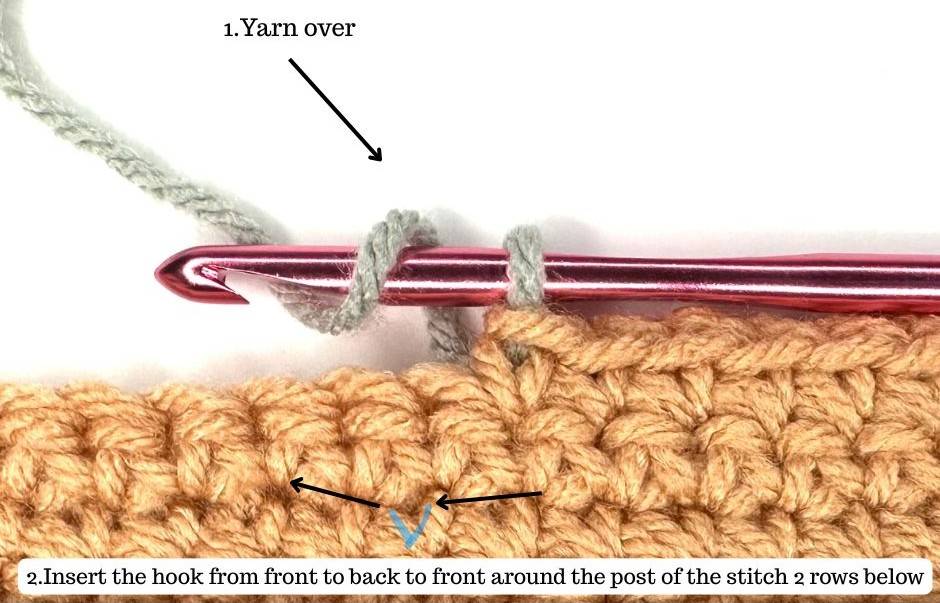
Sk1-FPdc (skip 1 stitch front post double crochet):skip 1 stitch in the working row; yo, insert your hook from front to back to front around the post of the stitch 2 rows below and pull up a loop; yo and draw through 2 loops, yo and draw through the remaining 2 loops on the hook in front of the skipped stitch. Always skip the stitch behind every Sk1-FPdc. Full tutorial here
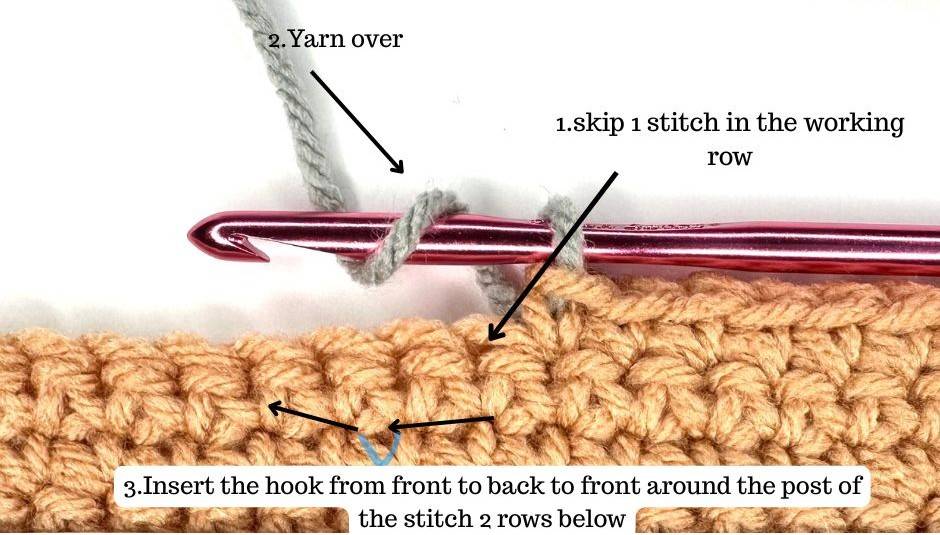
Ret1-FPdc (return 1 stitch back front post double crochet):return 1 stitch back in the working row; yo, insert your hook from front to back to front around the post of the stitch 2 rows below and pull up a loop; yo and draw through 2 loops, yo and draw through the remaining 2 loops on the hook. Always skip the stitch behind each Ret1-FPdc. Full tutorial here
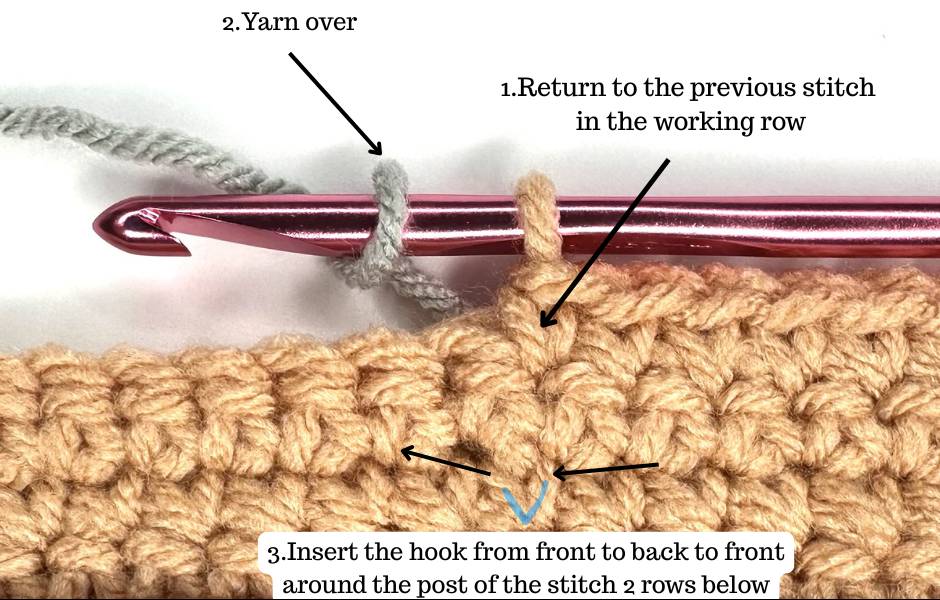
Ret2-FPtr (return 2 stitches back front post treble): return back to the 2nd stitch in the working row; yo twice, insert your hook from front to back to front around the post of the stitch 2 rows below and pull up a loop; [yo and draw through 2 loops] twice, yo and draw through the remaining 2 loops on the hook. Always skip the stitch behind every Ret2-FPtr. Full tutorial here
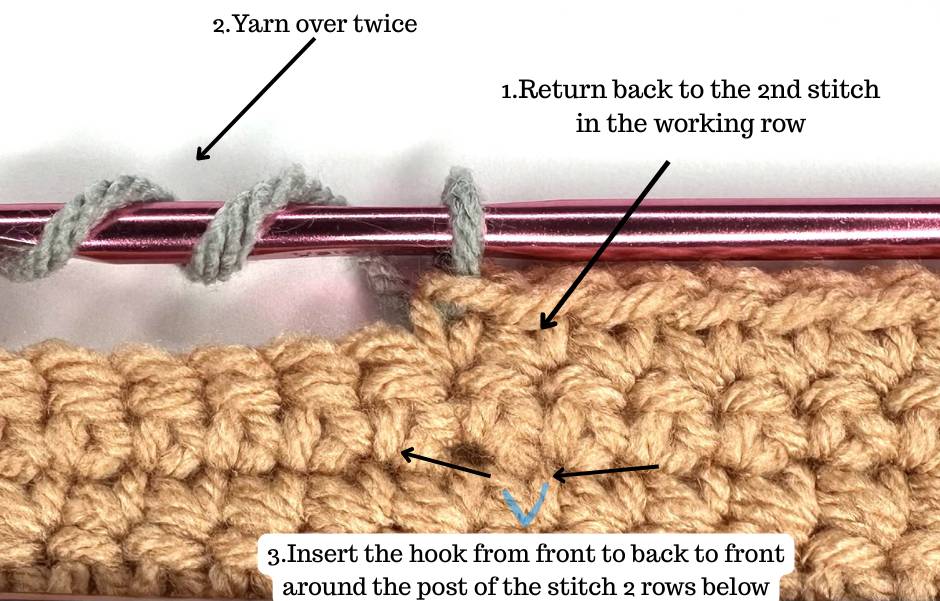
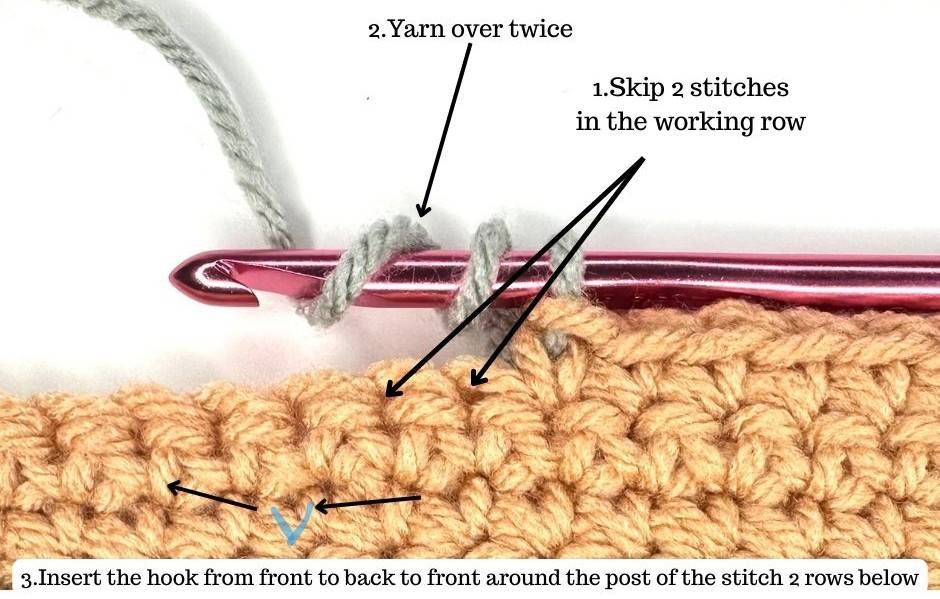
Sk2-FPtr (skip 2 stitches front post treble): skip the next 2 stitches in the working row; yo twice, insert your hook from front to back to front around the post of the stitch 2 rows below and pull up a loop; [yo and draw through 2 loops] twice, yo and draw through the remaining 2 loops on the hook in front of the 2 skipped stitches. Always skip the stitch behind every Sk2-FPtr. Full tutorial here
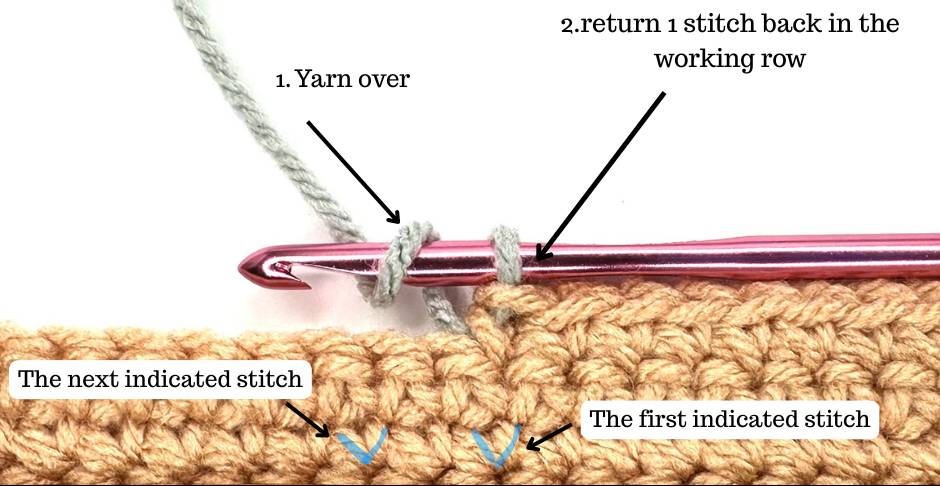
Ret1/Sk1 FPdc2tog (front post double crochet 2 together worked around posts one stitch back and one stitch ahead): yarn over, return to the previous stitch in working row; insert the hook from front to back to front around the post of the first indicated stitch two rows below, yarn over and pull up a loop, yarn over and draw through 2 loops (2 loops remain on the hook); yarn over, insert the hook around the post of the second indicated stitch 1 stitch ahead and two rows below, yarn over and pull up a loop, yarn over and draw through 2 loops (3 loops on the hook), yarn over and draw through all 3 loops. Always skip the stitch behind the top of each Ret1/Sk1 FPdc2tog. Full tutorial here
Gauge:
8.5 sts and 10 rows = 2” [5 cm] in textured pattern of front post stitches and sc using suggested hook.
Gauge is measured after blocking.
Notes:
The pattern is worked in rows. Beginning ch does not count as a stitch. Always skip the stitch directly behind each front post stitch. Front post stitches are always worked around the post of the stitch two rows below, whether that stitch is a regular sc or another front post stitch. To avoid distortion or curling of the fabric, make sure to work all front post stitches loosely and evenly. Excess tension on front post stitches can cause the pattern to lean or tighten.
Instructions:
Row 1: Ch 44, dc in 3rd ch from hook and in each ch across; ch 2, turn – 42 sts.

(photo shows one pattern repeat only)
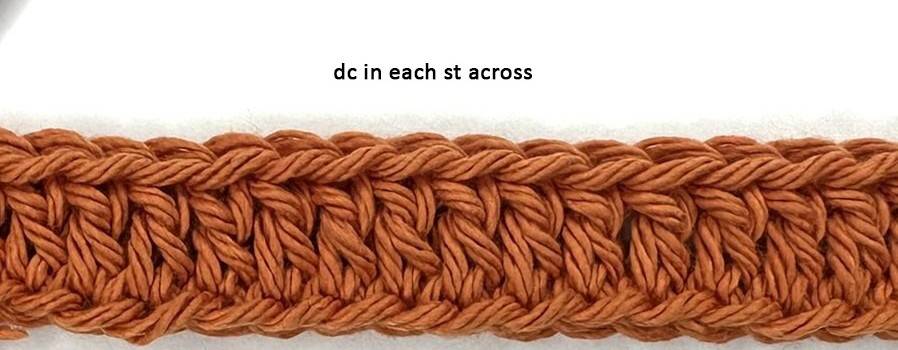
(Row 1 – photo shows one pattern repeat only)
Row 2: FPdc around first st and each st across; ch 1, turn – 42 sts.
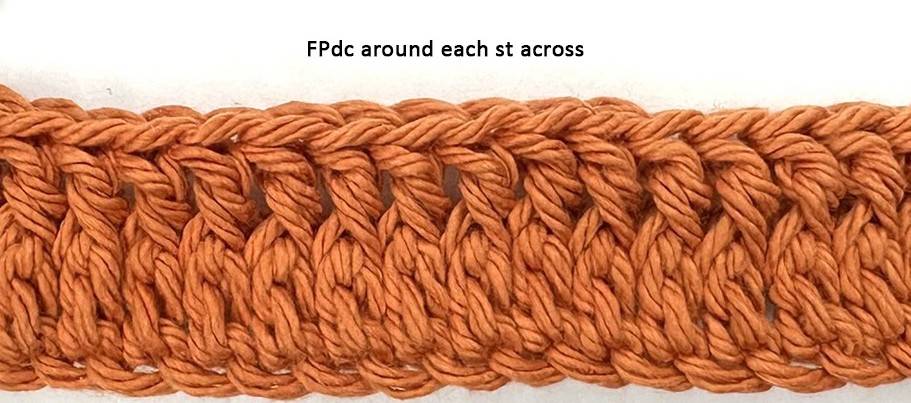
(Row 2 – photo shows one pattern repeat only)
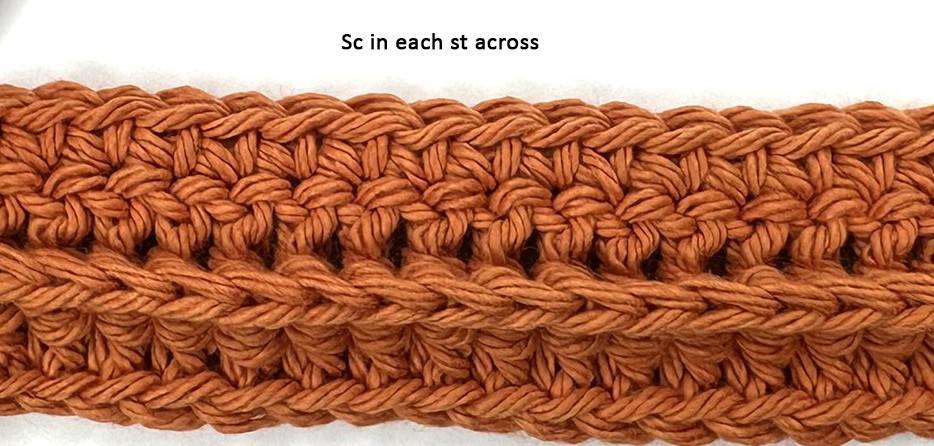
(Row 3 – photo shows one pattern repeat only)
Row 4 (WS): Sc in first st and each st across; ch 1, turn – 42 sts.
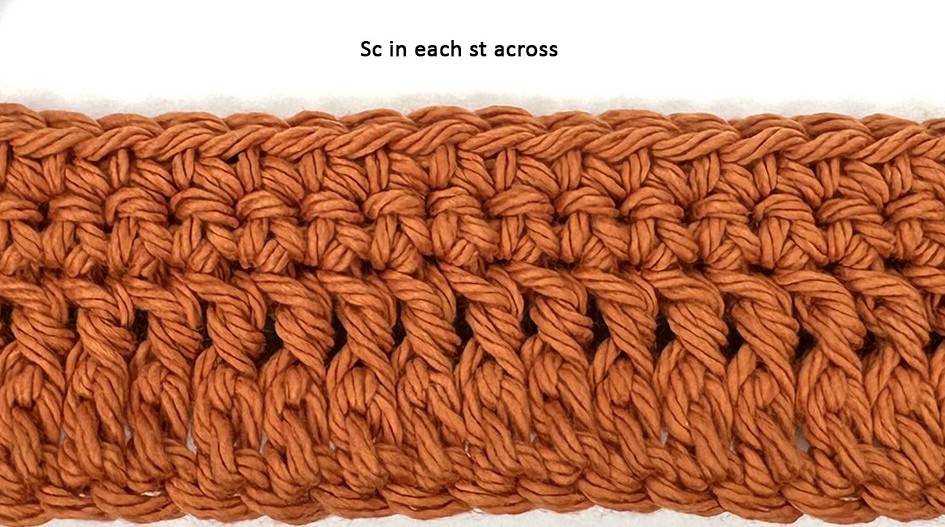
(Row 4 – photo shows one pattern repeat only)
Row 5 (RS): [Sc in first 3 sts, Sk2-FPtr, sc, Sk1-FPdc, sc, FPdc, sc, Ret1-FPdc, sc, Ret2-FPtr, sc in next 2 sts] 3 times; ch 1, turn – 42 sts.
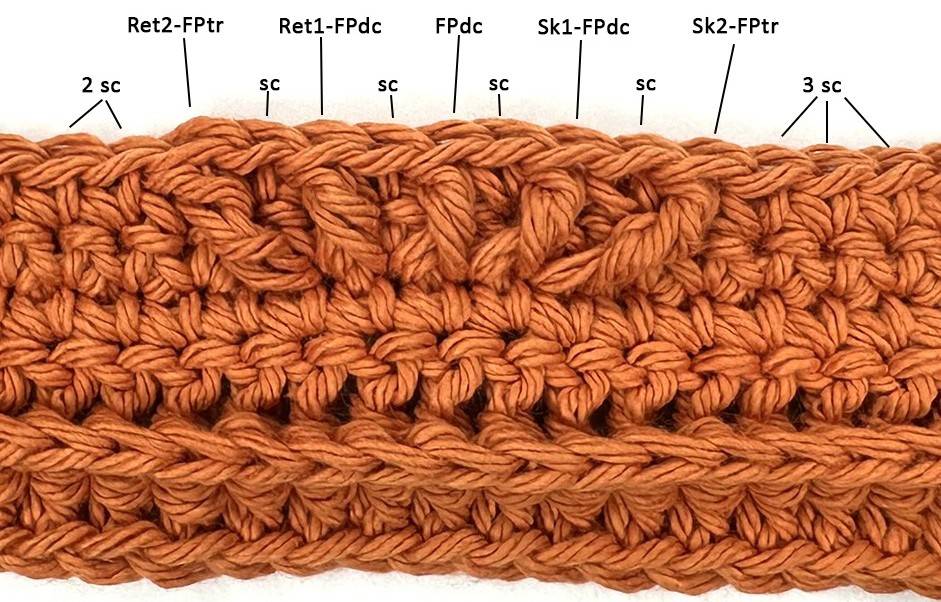
(Row 5 – photo shows one pattern repeat only)
Row 6: Sc in first st and each st across; ch 1, turn – 42 sts.
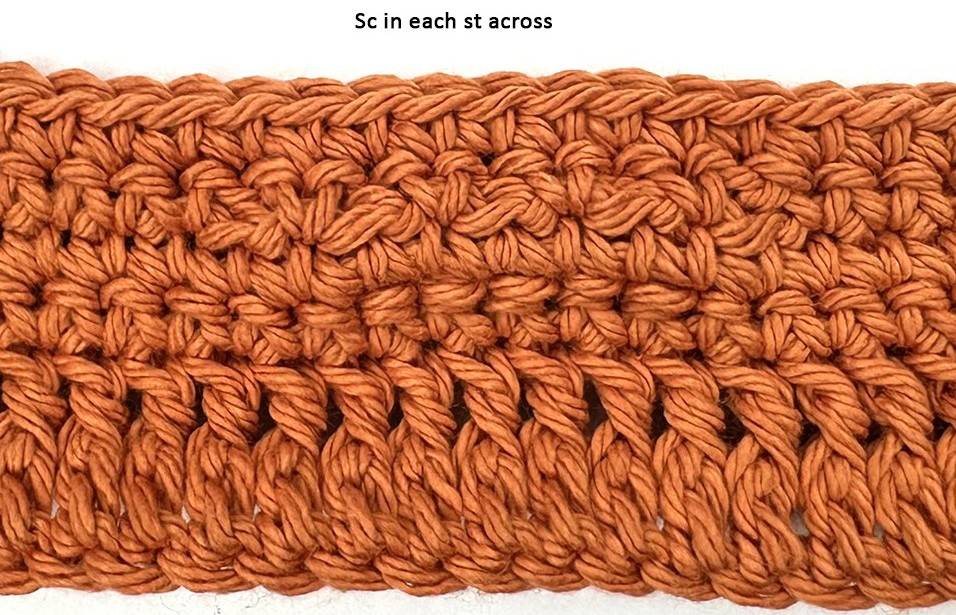
(Row 6 – photo shows one pattern repeat only)
Row 7: [Sc in first 3 sts, FPdc (around Sk2-FPtr), sc, FPdc (around Sk1-FPdc), sc, FPdc (around FPdc), sc, FPdc (around Ret1-FPdc), sc, FPdc (around Ret2-FPtr), sc in next 2 sts] 3 times; ch 1, turn – 42 sts.
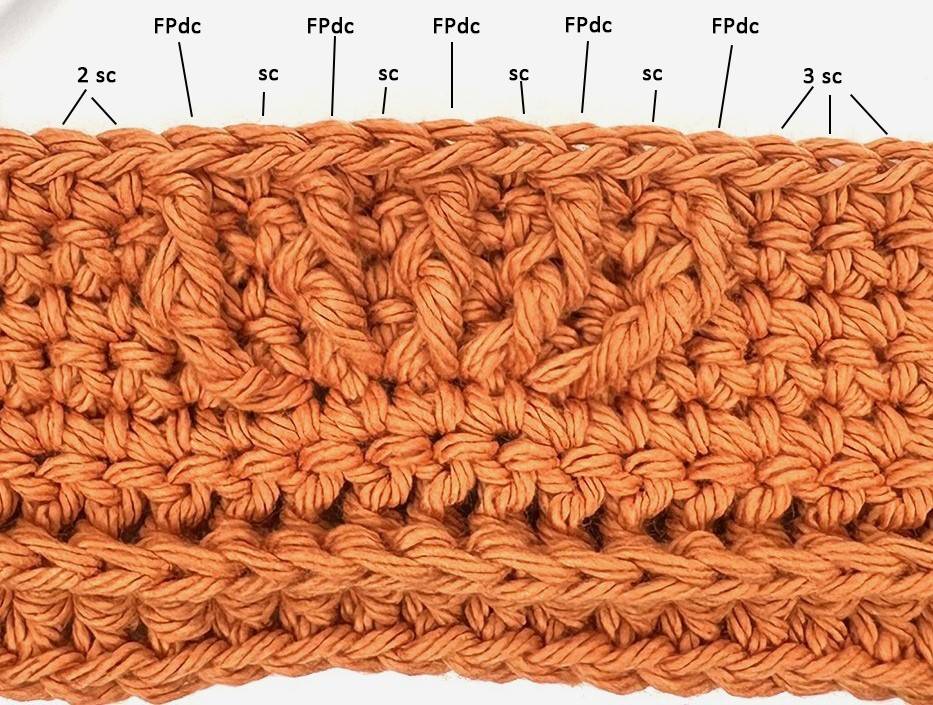
(Row 7 – photo shows one pattern repeat only)
Row 8: Sc in first st and each st across; ch 1, turn – 42 sts.
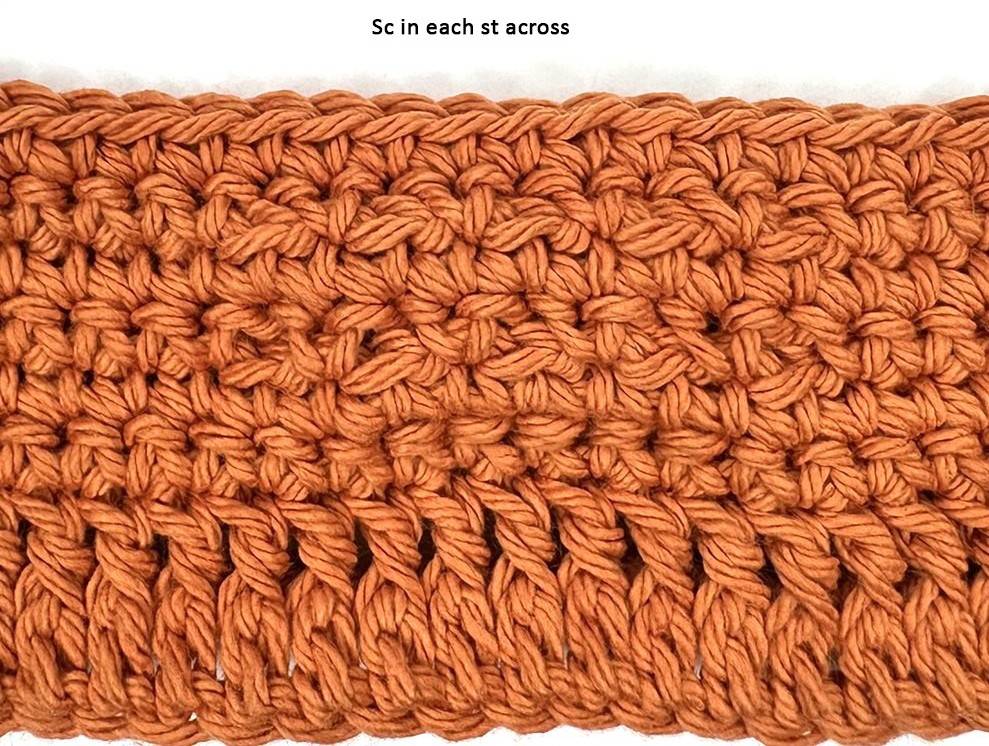
(Row 8 – photo shows one pattern repeat only)
Row 9: [Sc in first 5 sts, Ret2-FPtr (around FPdc), Ret1/Sk1 FPdc2tog, sc, Ret1/Sk1 FPdc2tog (the first FPdc of this FPdc2tog is worked around the same post as the last FPdc of the previous FPdc2tog), Sk1-FPtr (around FPdc) sc in next 4 sts] 3 times; ch 1, turn – 42 sts.
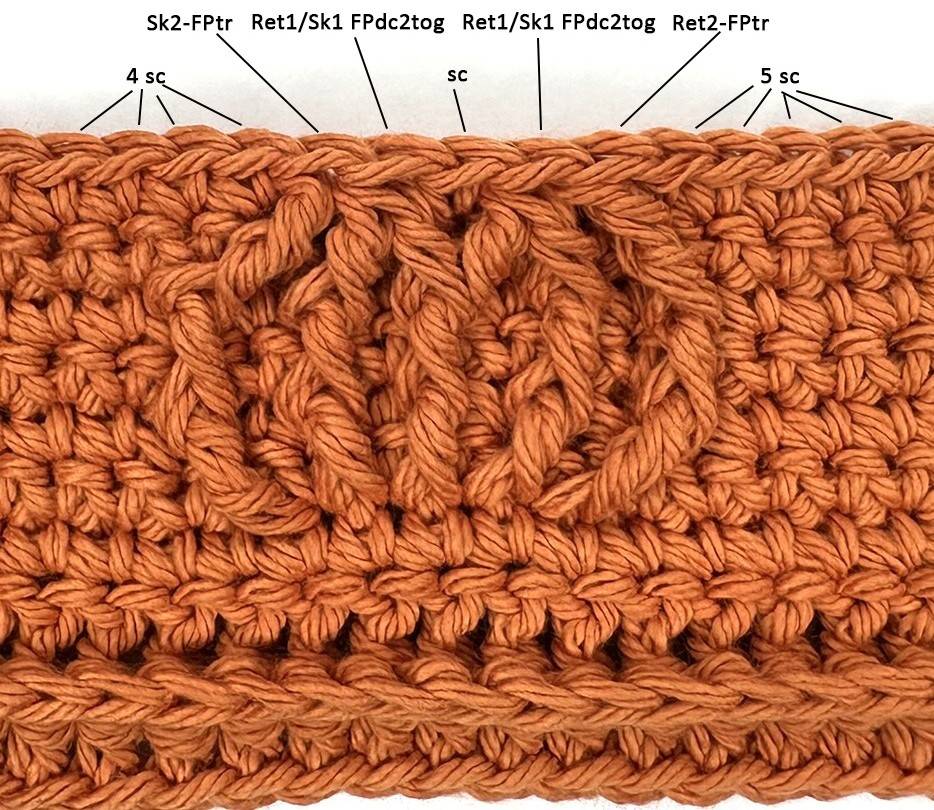
(Row 9 – photo shows one pattern repeat only)
Row 10: Sc in first st and each st across; ch 1, turn – 42 sts.
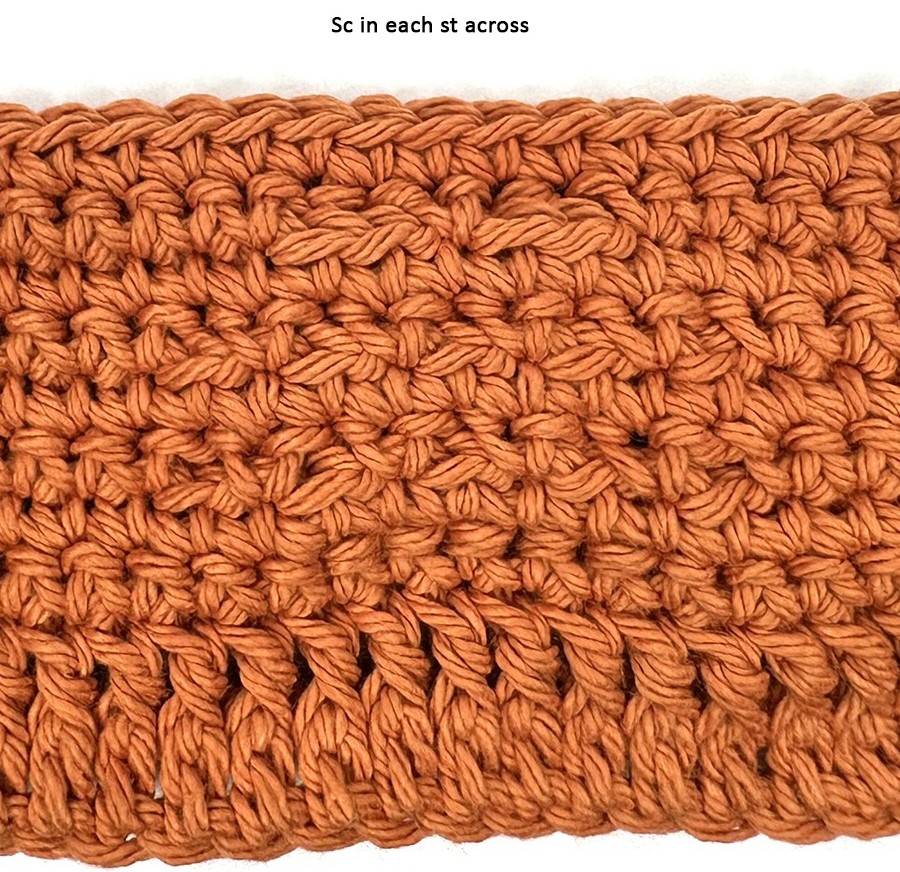
(Row 10 – photo shows one pattern repeat only)
Row 11: [Sc in first 6 sts, Sk1-FPdc (around sc), sc in next 7 sts] 3 times; ch 1, turn – 42 sts.
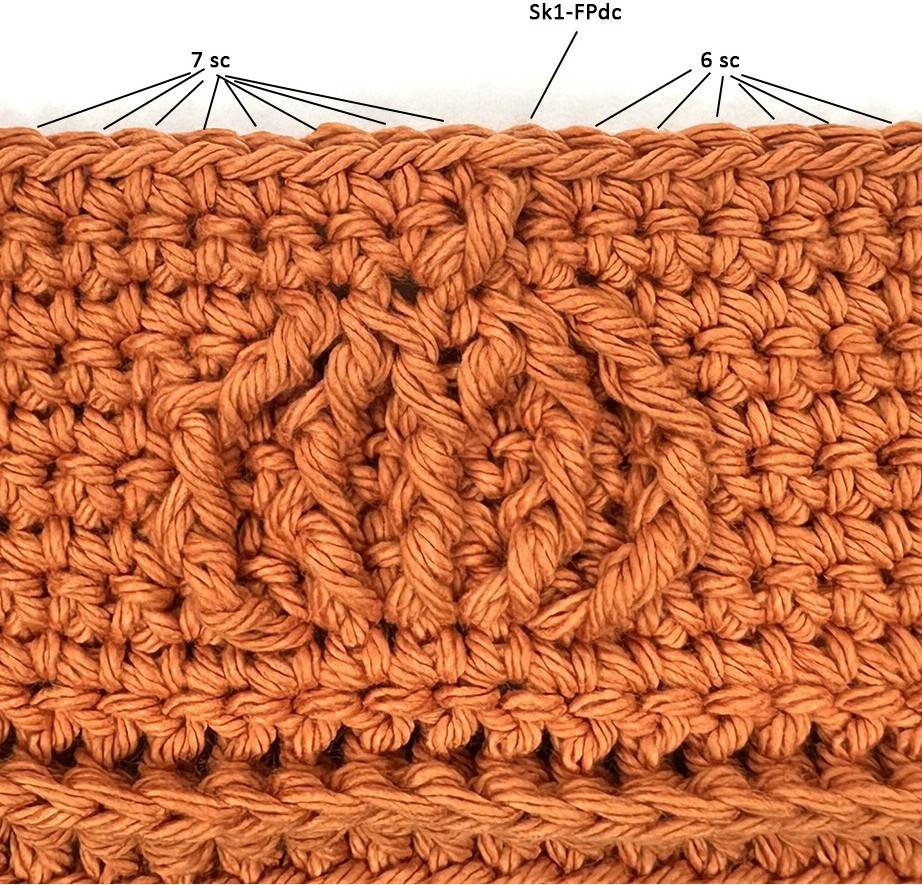
(Row 11 – photo shows one pattern repeat only)
Row 12: Sc in first st and each st across; ch 2, turn – 42 sts.
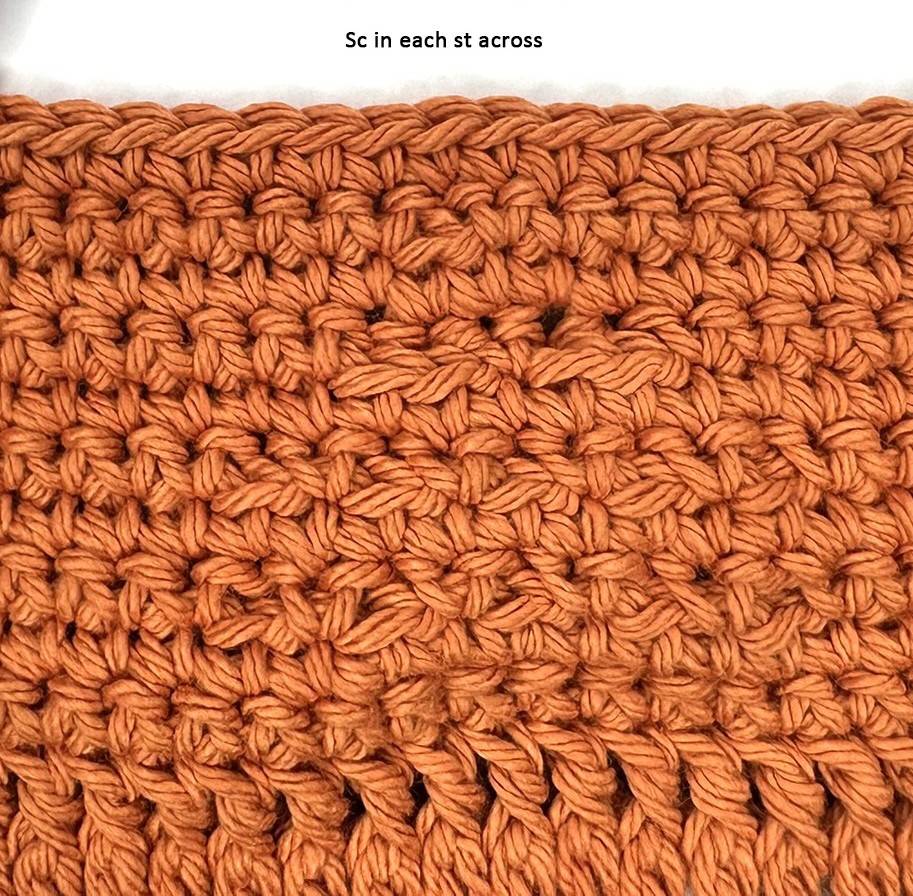
(Row 12 – photo shows one pattern repeat only)
Row 13: Dc in first st and each st across; ch 2, turn – 42 sts.
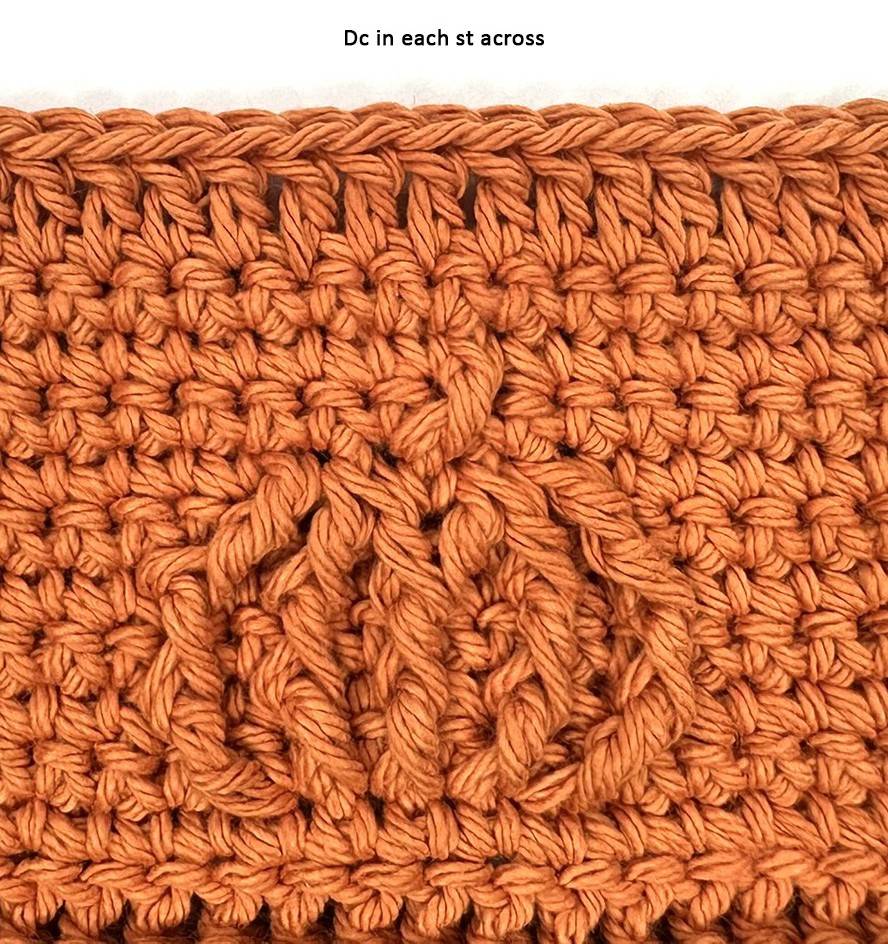
(Row 13 – photo shows one pattern repeat only)
Row 14: FPdc around first st and each st across; ch 1, turn – 42 sts.
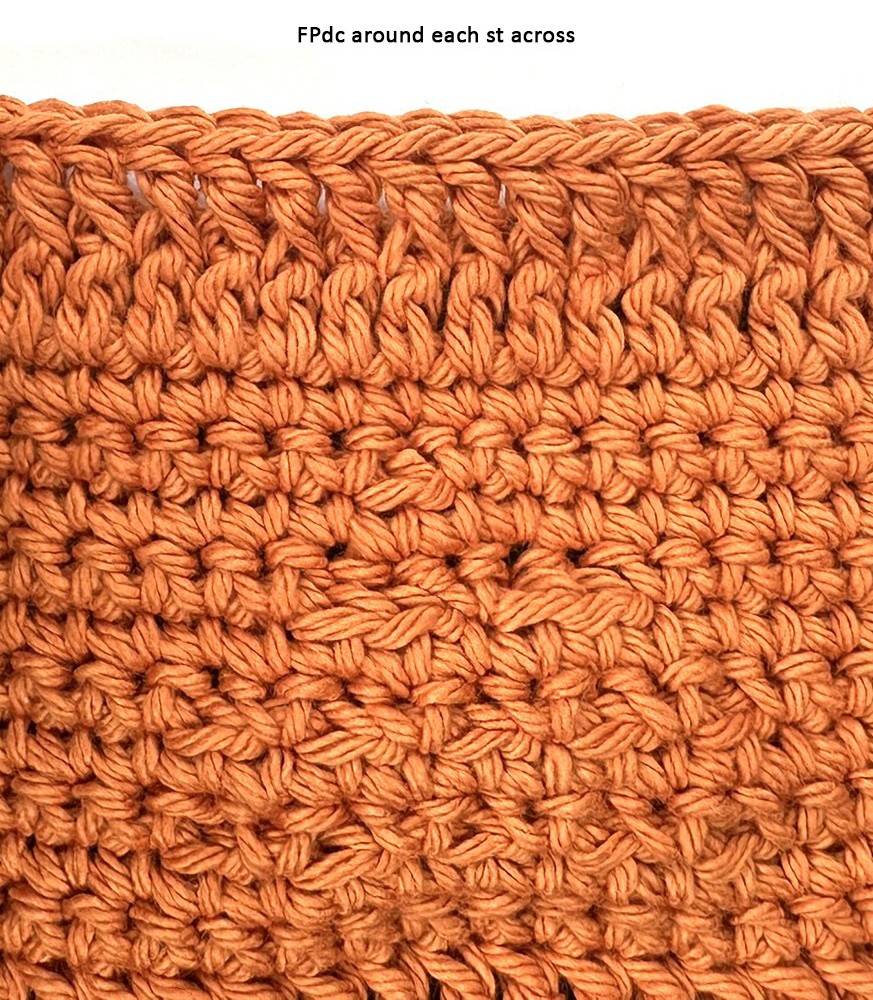
(Row 14 – photo shows one pattern repeat only)
Fasten off, leaving a 10″ tail for seaming.
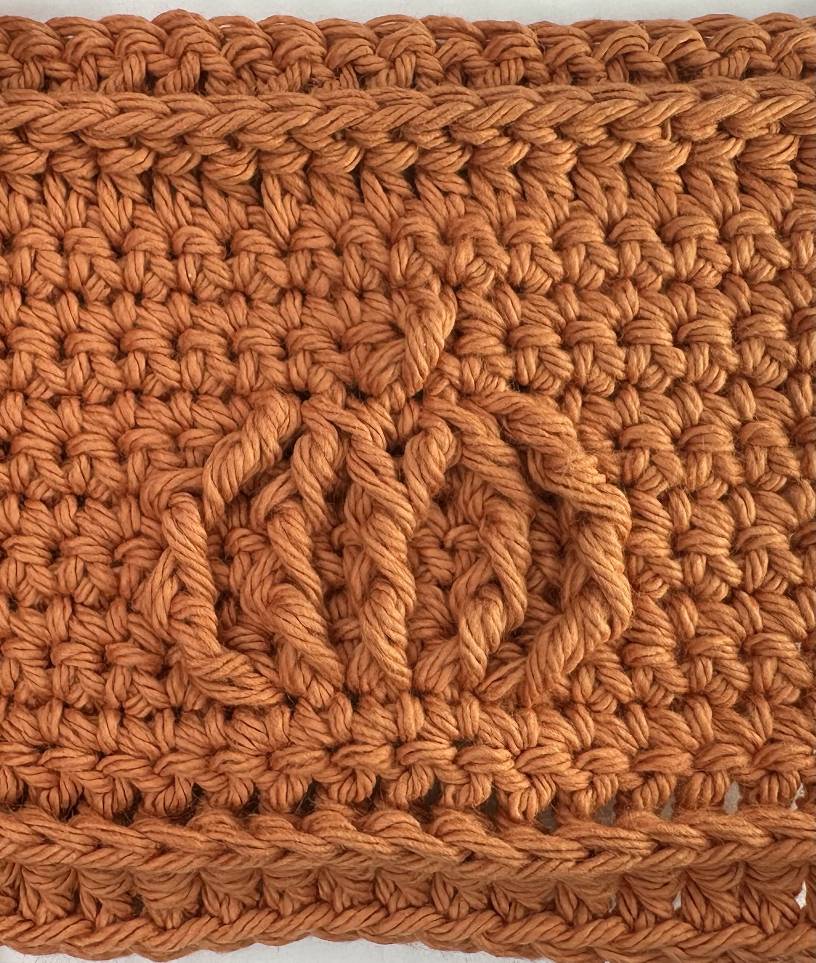
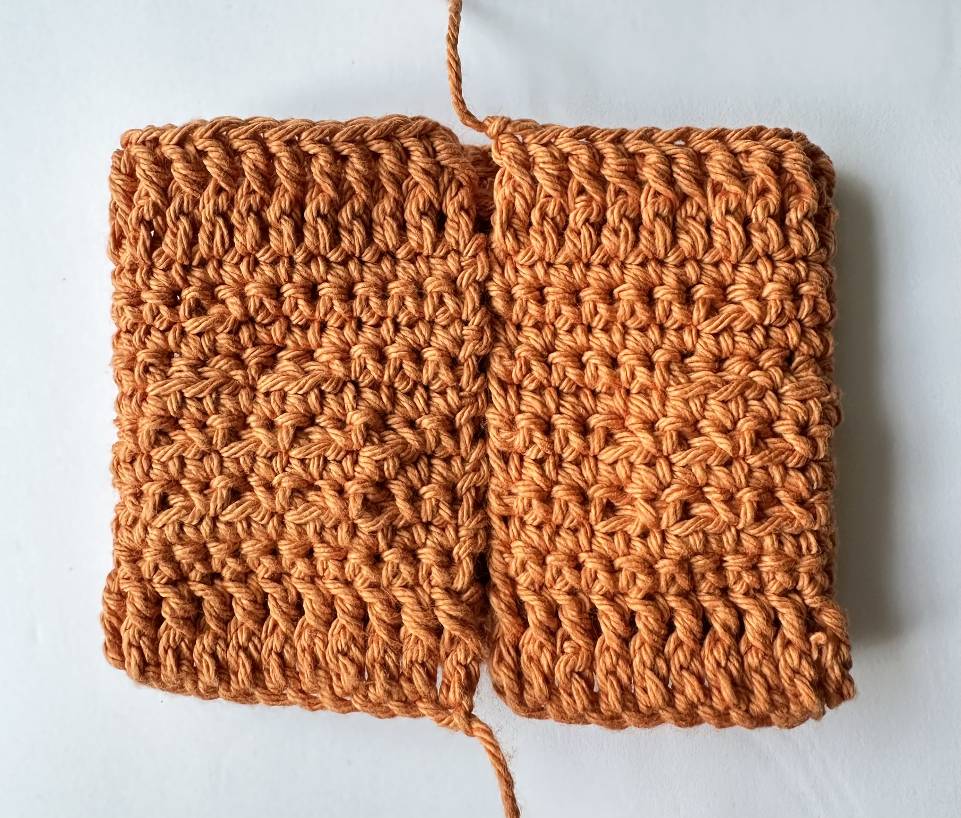
(photo shows completed one pattern repeat only)
After finishing Row 14, check your work — the piece should now measure around 10 in [25 cm] in length.
For those who prefer working from a chart, a finished chart with the pattern repeat highlighted is provided below.
Chart:
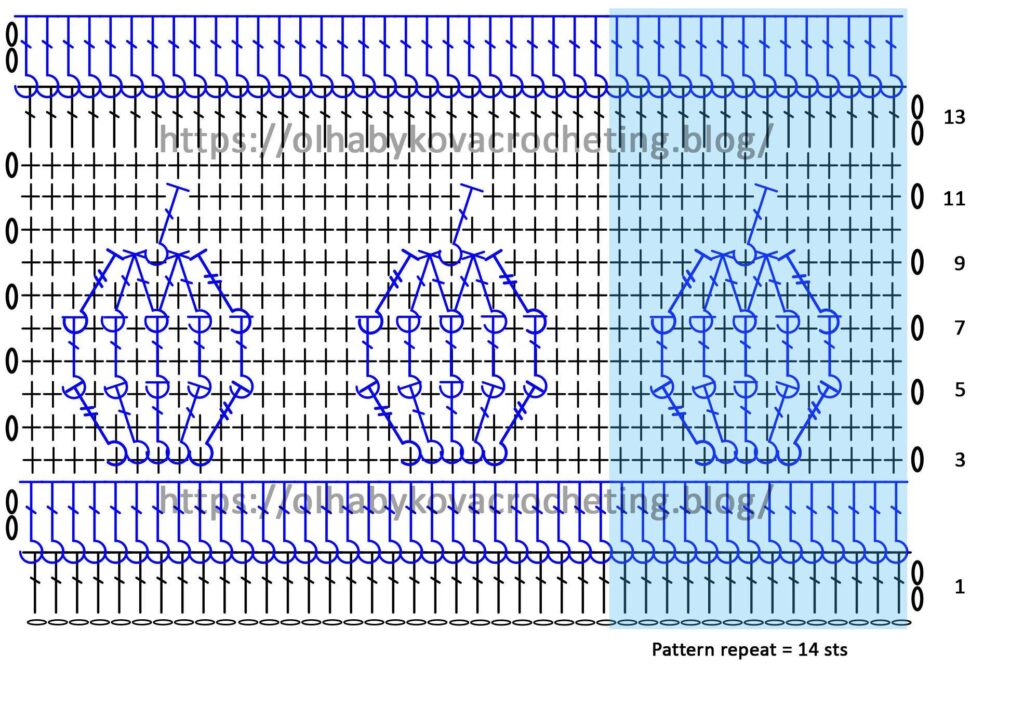
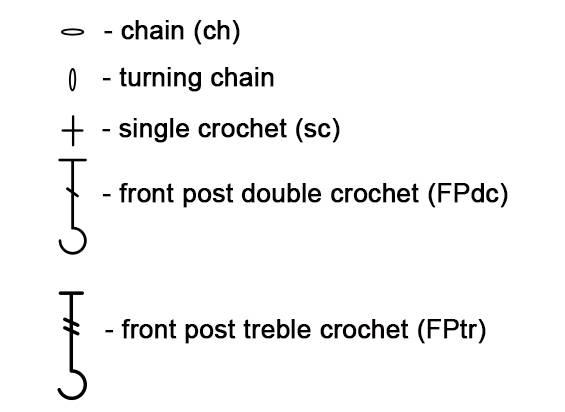
The diagram shows the pattern repeat 14 sts. Read RS rows from right to left and WS rows from left to right. Refer to Key for stitch symbols.
Finishing:
With yarn needle, seam short ends together using mattress stitch. Fasten off and weave in ends.
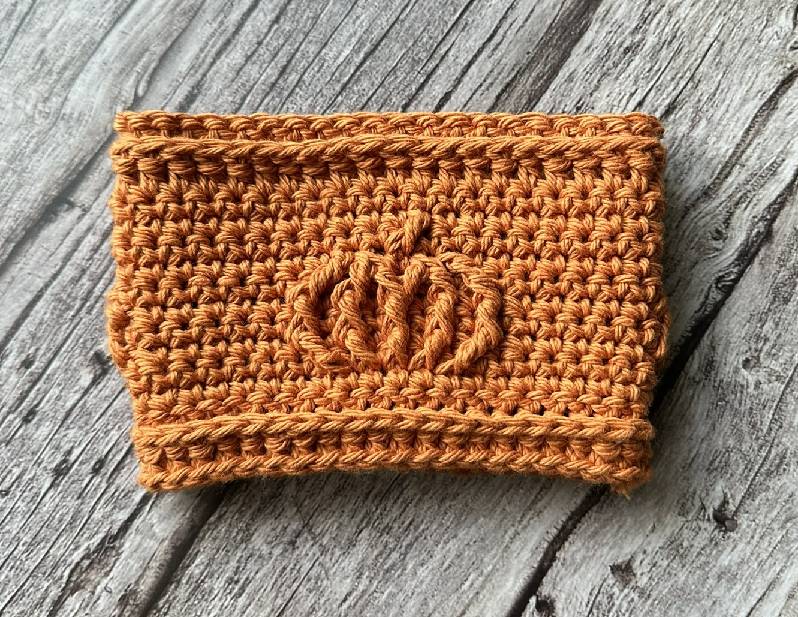
Blocking:
For best results, block your cup cozy after finishing.
Recommended method (for cotton yarn):
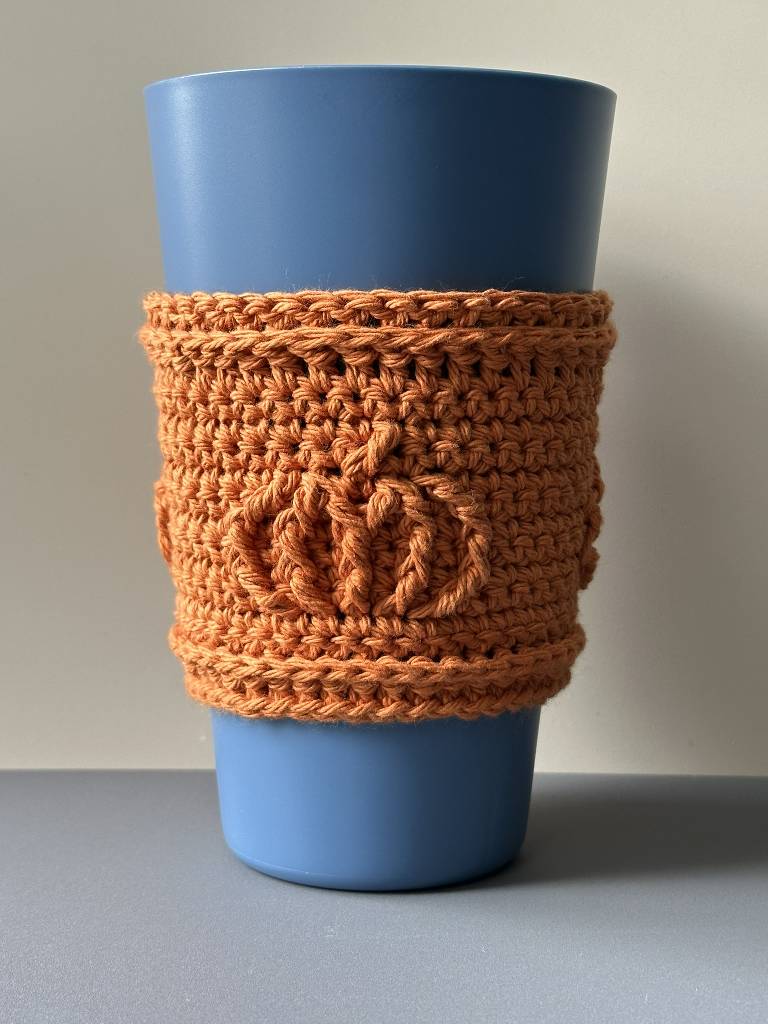
- 1. Slip the cozy onto the cup it’s intended for.
- 2. Fill the cup with hot (not boiling) water — about 70–80 °C (160–175 °F).
- 3. Let it sit for 15–20 minutes to allow the fibers to relax and shape to the cup.
- 4. Pour out the water but leave the cozy on the cup until it’s completely dry.
This method allows the cotton to “memorize” the exact shape and size of your cup while keeping all textured stitches nicely defined.
Care for the finished piece according to the yarn label instructions.
Enjoy your creation! Whether you wear it, gift it, display it, or sell the finished product.
Let it bring joy and comfort.
Pattern reminders:
- This pattern is intended for personal use only. Reproduction, distribution, or commercial use without the designer’s permission is not allowed.
- You may sell finished items made using this pattern, but please credit the designer: Olha Bykova Crocheting.
- Share your finished projects! I love seeing how you bring this pattern to life. Tag your photos with #OlhaBykovaCrocheting on social media.
- For any questions about the pattern or techniques used, please refer to the stitch glossary or contact the designer.
From Author: Thank you for reading!!! I did my best to make it clear and easy to follow. My goal was to make the process enjoyable, inspiring, and rewarding — so that you feel proud of the result.
However, if you have any questions about the pattern, don’t hesitate to reach out to me by email — I am always happy to help and explain anything that might seem unclear:
You can also join my Facebook page to stay updated on all the new releases:
https://www.facebook.com/olhabykovacrocheting
Wishing you many happy stitches and lots of joyful crocheting!
Loved this pattern? Take a look at my other textured and aran crochet patterns — each one made to bring a touch of cozy handmade charm to your next project.

