How to make Sk1-FPpuff
The Skip 1 Front Post Puff Stitch (Sk1-FPpuff) is a textured crochet stitch that creates a bold, raised surface by skipping one stitch in the working row and forming a front post puff stitch around a stitch located two rows below. This step-by-step photo tutorial explains how to correctly identify the stitch placement, where to insert the hook, and how the Sk1-FPpuff is represented in crochet charts, making it easier to use this stitch confidently in textured and cable-style crochet patterns.
How to read the abbreviation “Sk1-FPpuff”:
- Sk = skip → this means you skip a stitch in the working row.
- 1 = the number of stitches you skip. In this case, 1 stitch skip.
- FPpuff = the stitch you are going to make. Here, it is a Front Post puff stitch.
So, Sk1-FPpuff means: Skip 1 stitch and work a Front Post puff stitch around the stitch (usually two rows below).
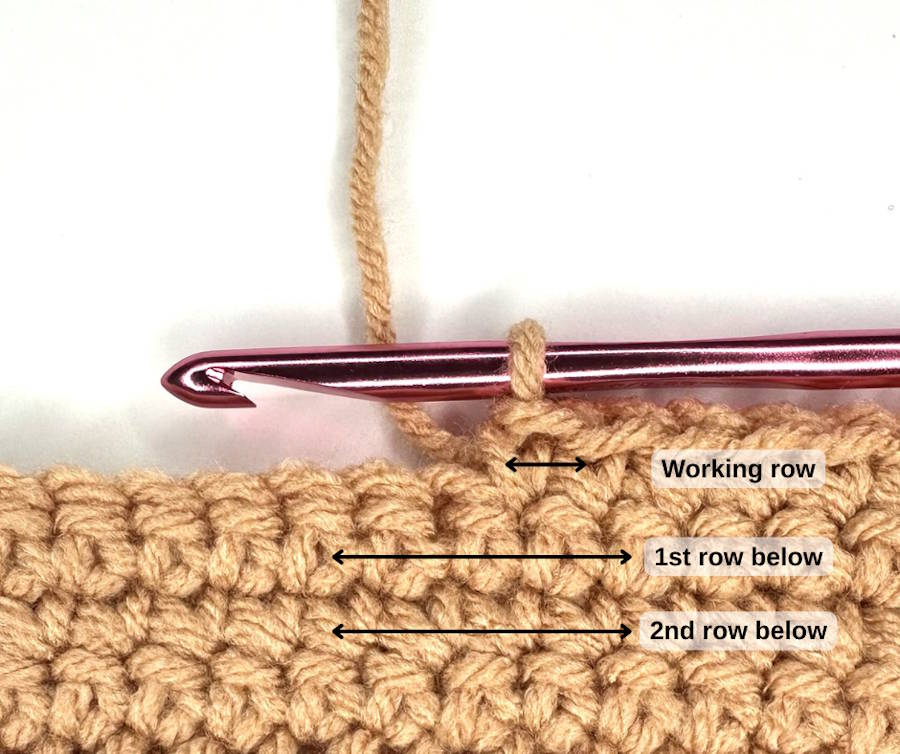
What does “second row below” mean?
When you see “work around the post of the stitch located two rows below,” it means that instead of inserting your hook into the working row, you reach down two rows.
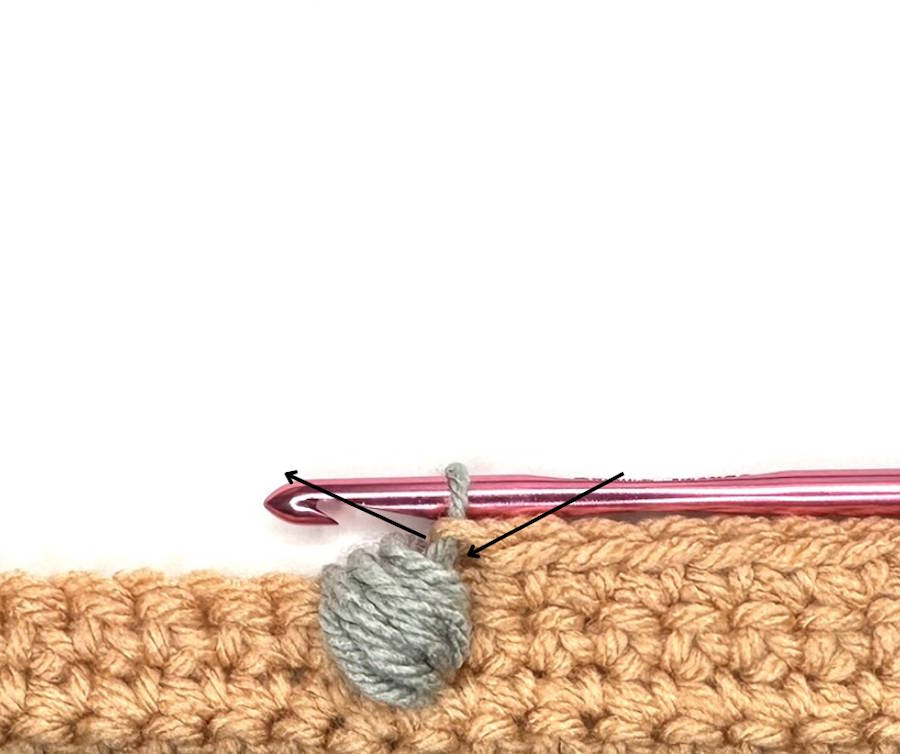
Step-by-step instructions
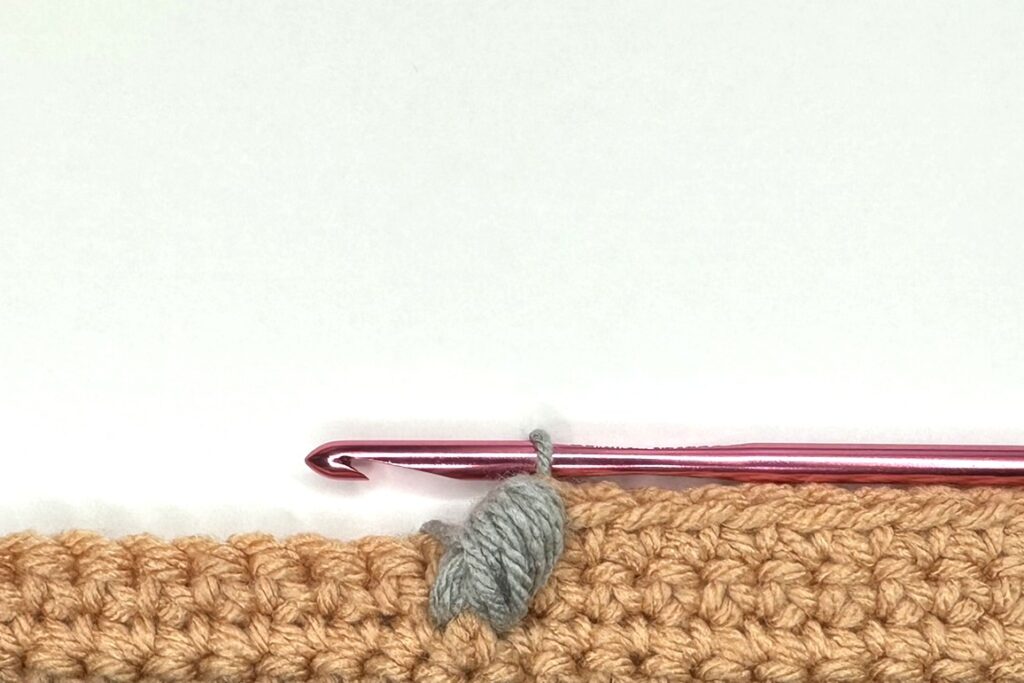
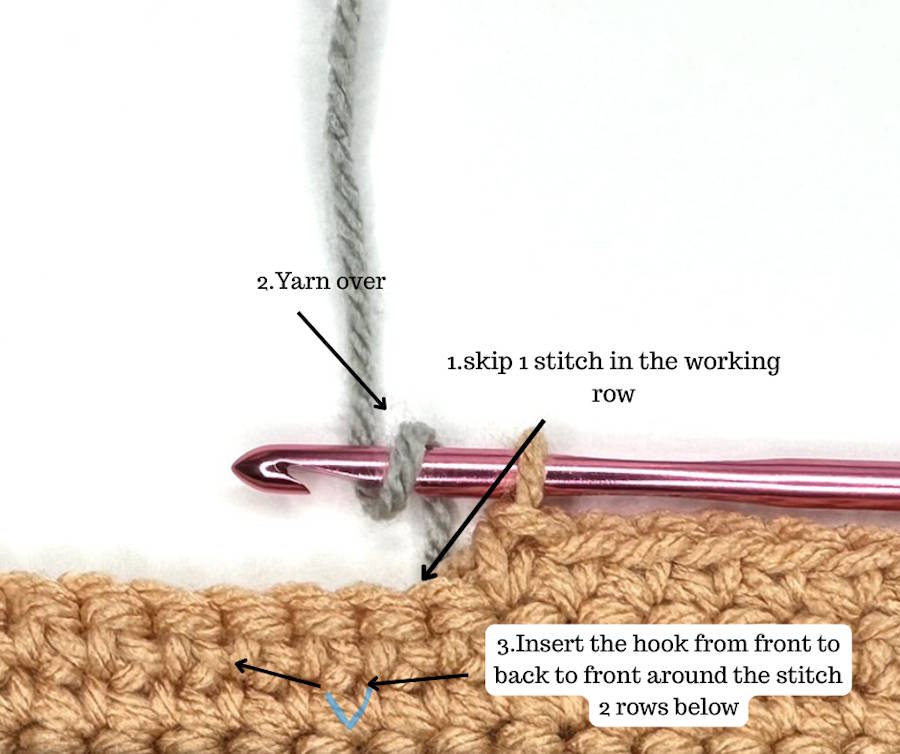
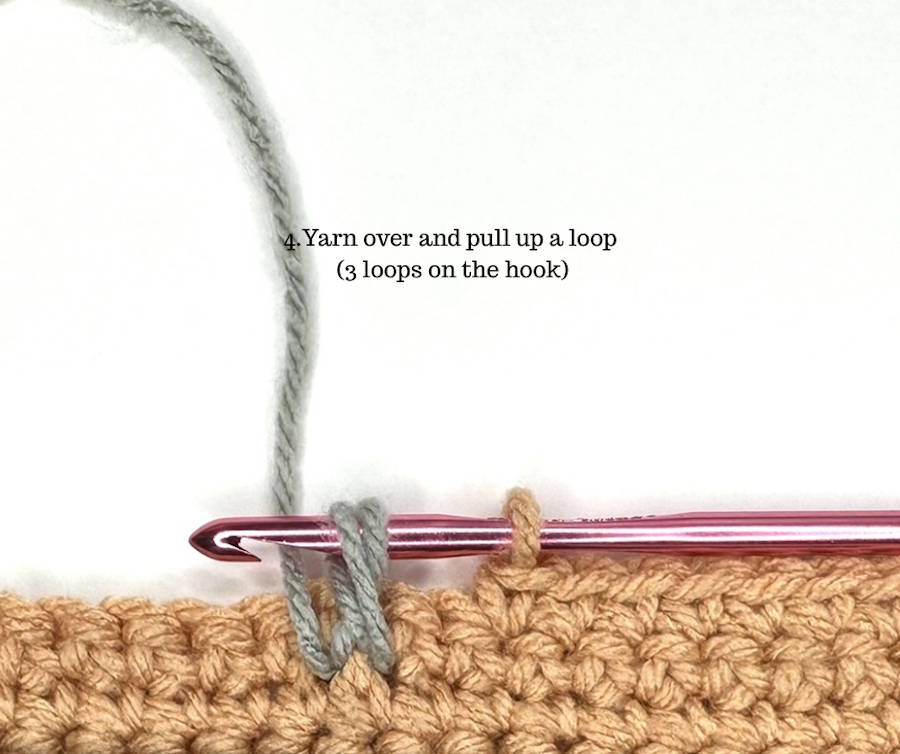
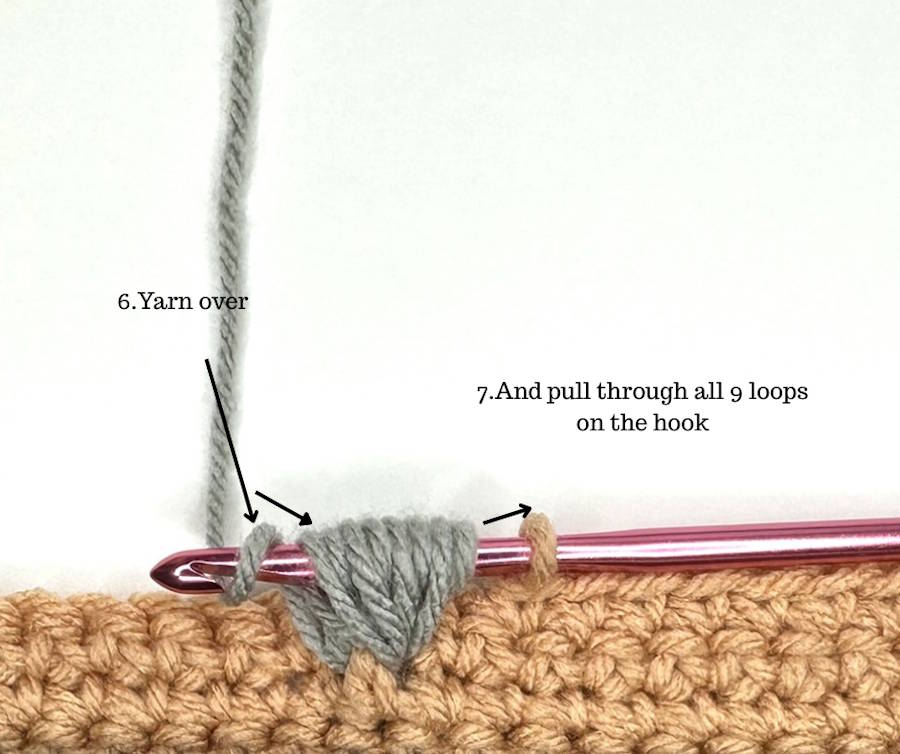
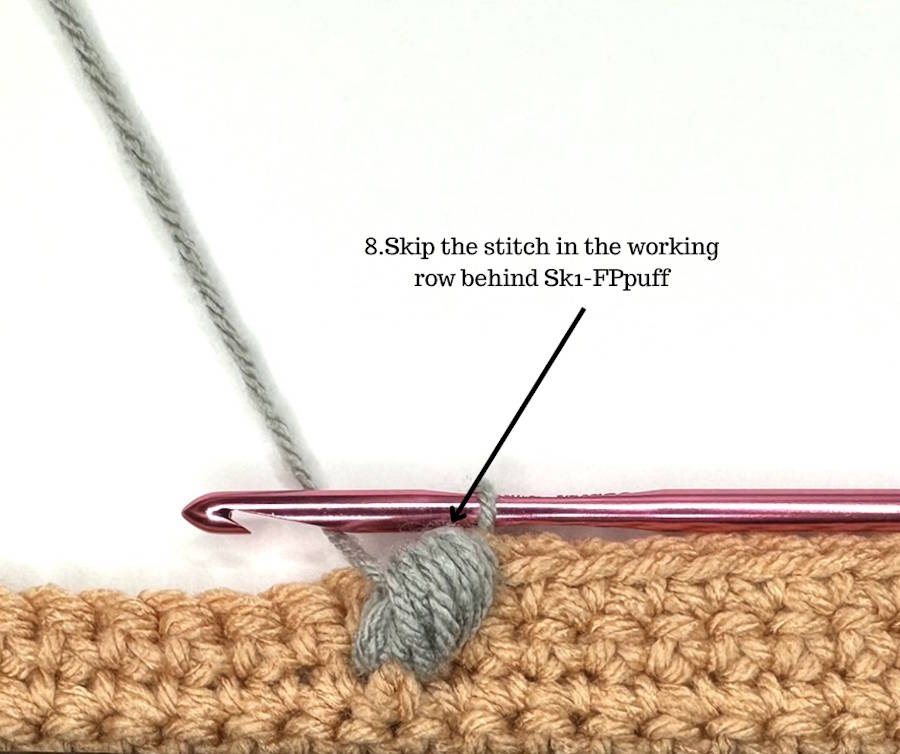
Sk1-FPpuff – skip 1 stitch and work front post puff stitch: skip 1 stitch in the working row; yarn over, insert the hook from front to back to front around the stitch two rows below the working row and draw up a loop (rep 4 times); yo and draw through all 9 loops on a hook. Always skip a stitch behind Sk1-FPpuff.
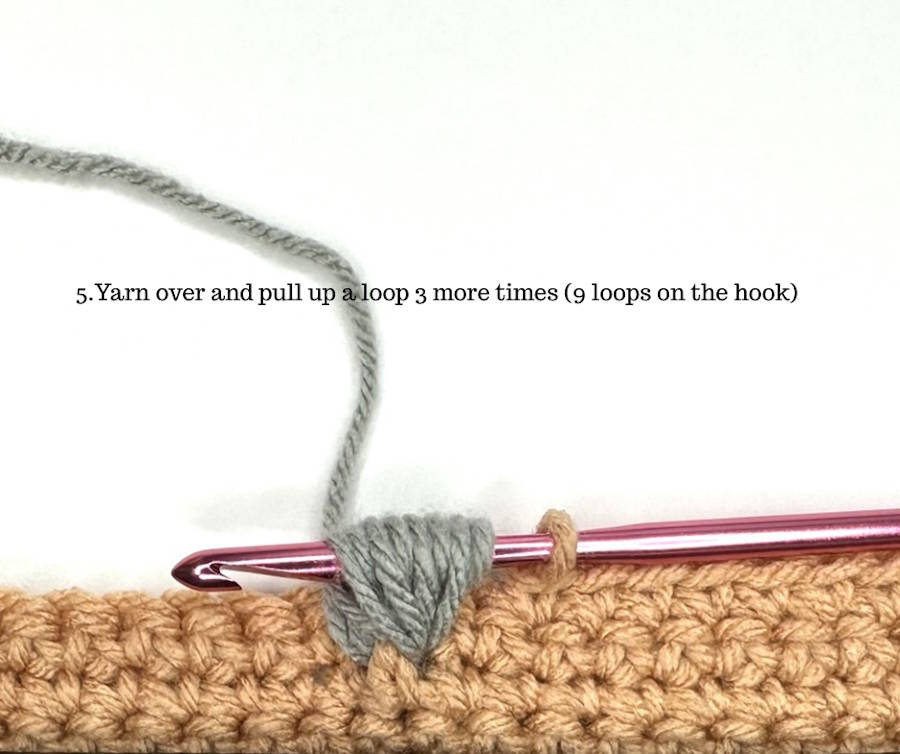
Depending on the pattern design, yarn weight, or personal preference, the yarn over and pull-up step may be repeated 2–3 times or up to 5 times. The number of repetitions determines how full and puffy the FP Puff stitch appears. Always refer to the Stitches section of the pattern for specific instructions.
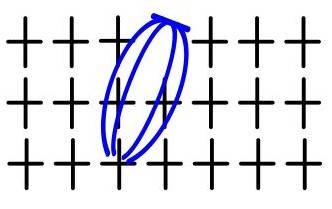
In charts, Sk1-FPpuff is shown using the standard Puff stitch symbol, but worked in specific location 2 rows below.
Depending on the pattern, it may be worked around a single crochet (sc), front post double crochet (FPdc), front post treble crochet (FPtr), or even another FPpuff two rows below. When working the stitch, always insert your hook around the narrow vertical section of the post that forms as the stitch is completed, just below the top loops. This ensures consistent stitch placement and a clean, well-defined texture.
TUTORIAL REMINDERS
- This tutorial is intended for personal use only. Reproduction, distribution, or commercial use without the designer’s permission is not allowed.
- For any questions about the pattern or techniques used, please refer to the stitch glossary of your pattern or contact the designer: